Woman Made Her Boyfriend A Costume Co They Could Cosplay Together
Kenneth Coo
Published
11/15/2016
in
ftw
Skyrim doesn't belong to the Nords, it belongs to her.
- List View
- Player View
- Grid View
Advertisement
-
1.
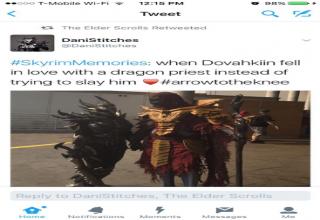
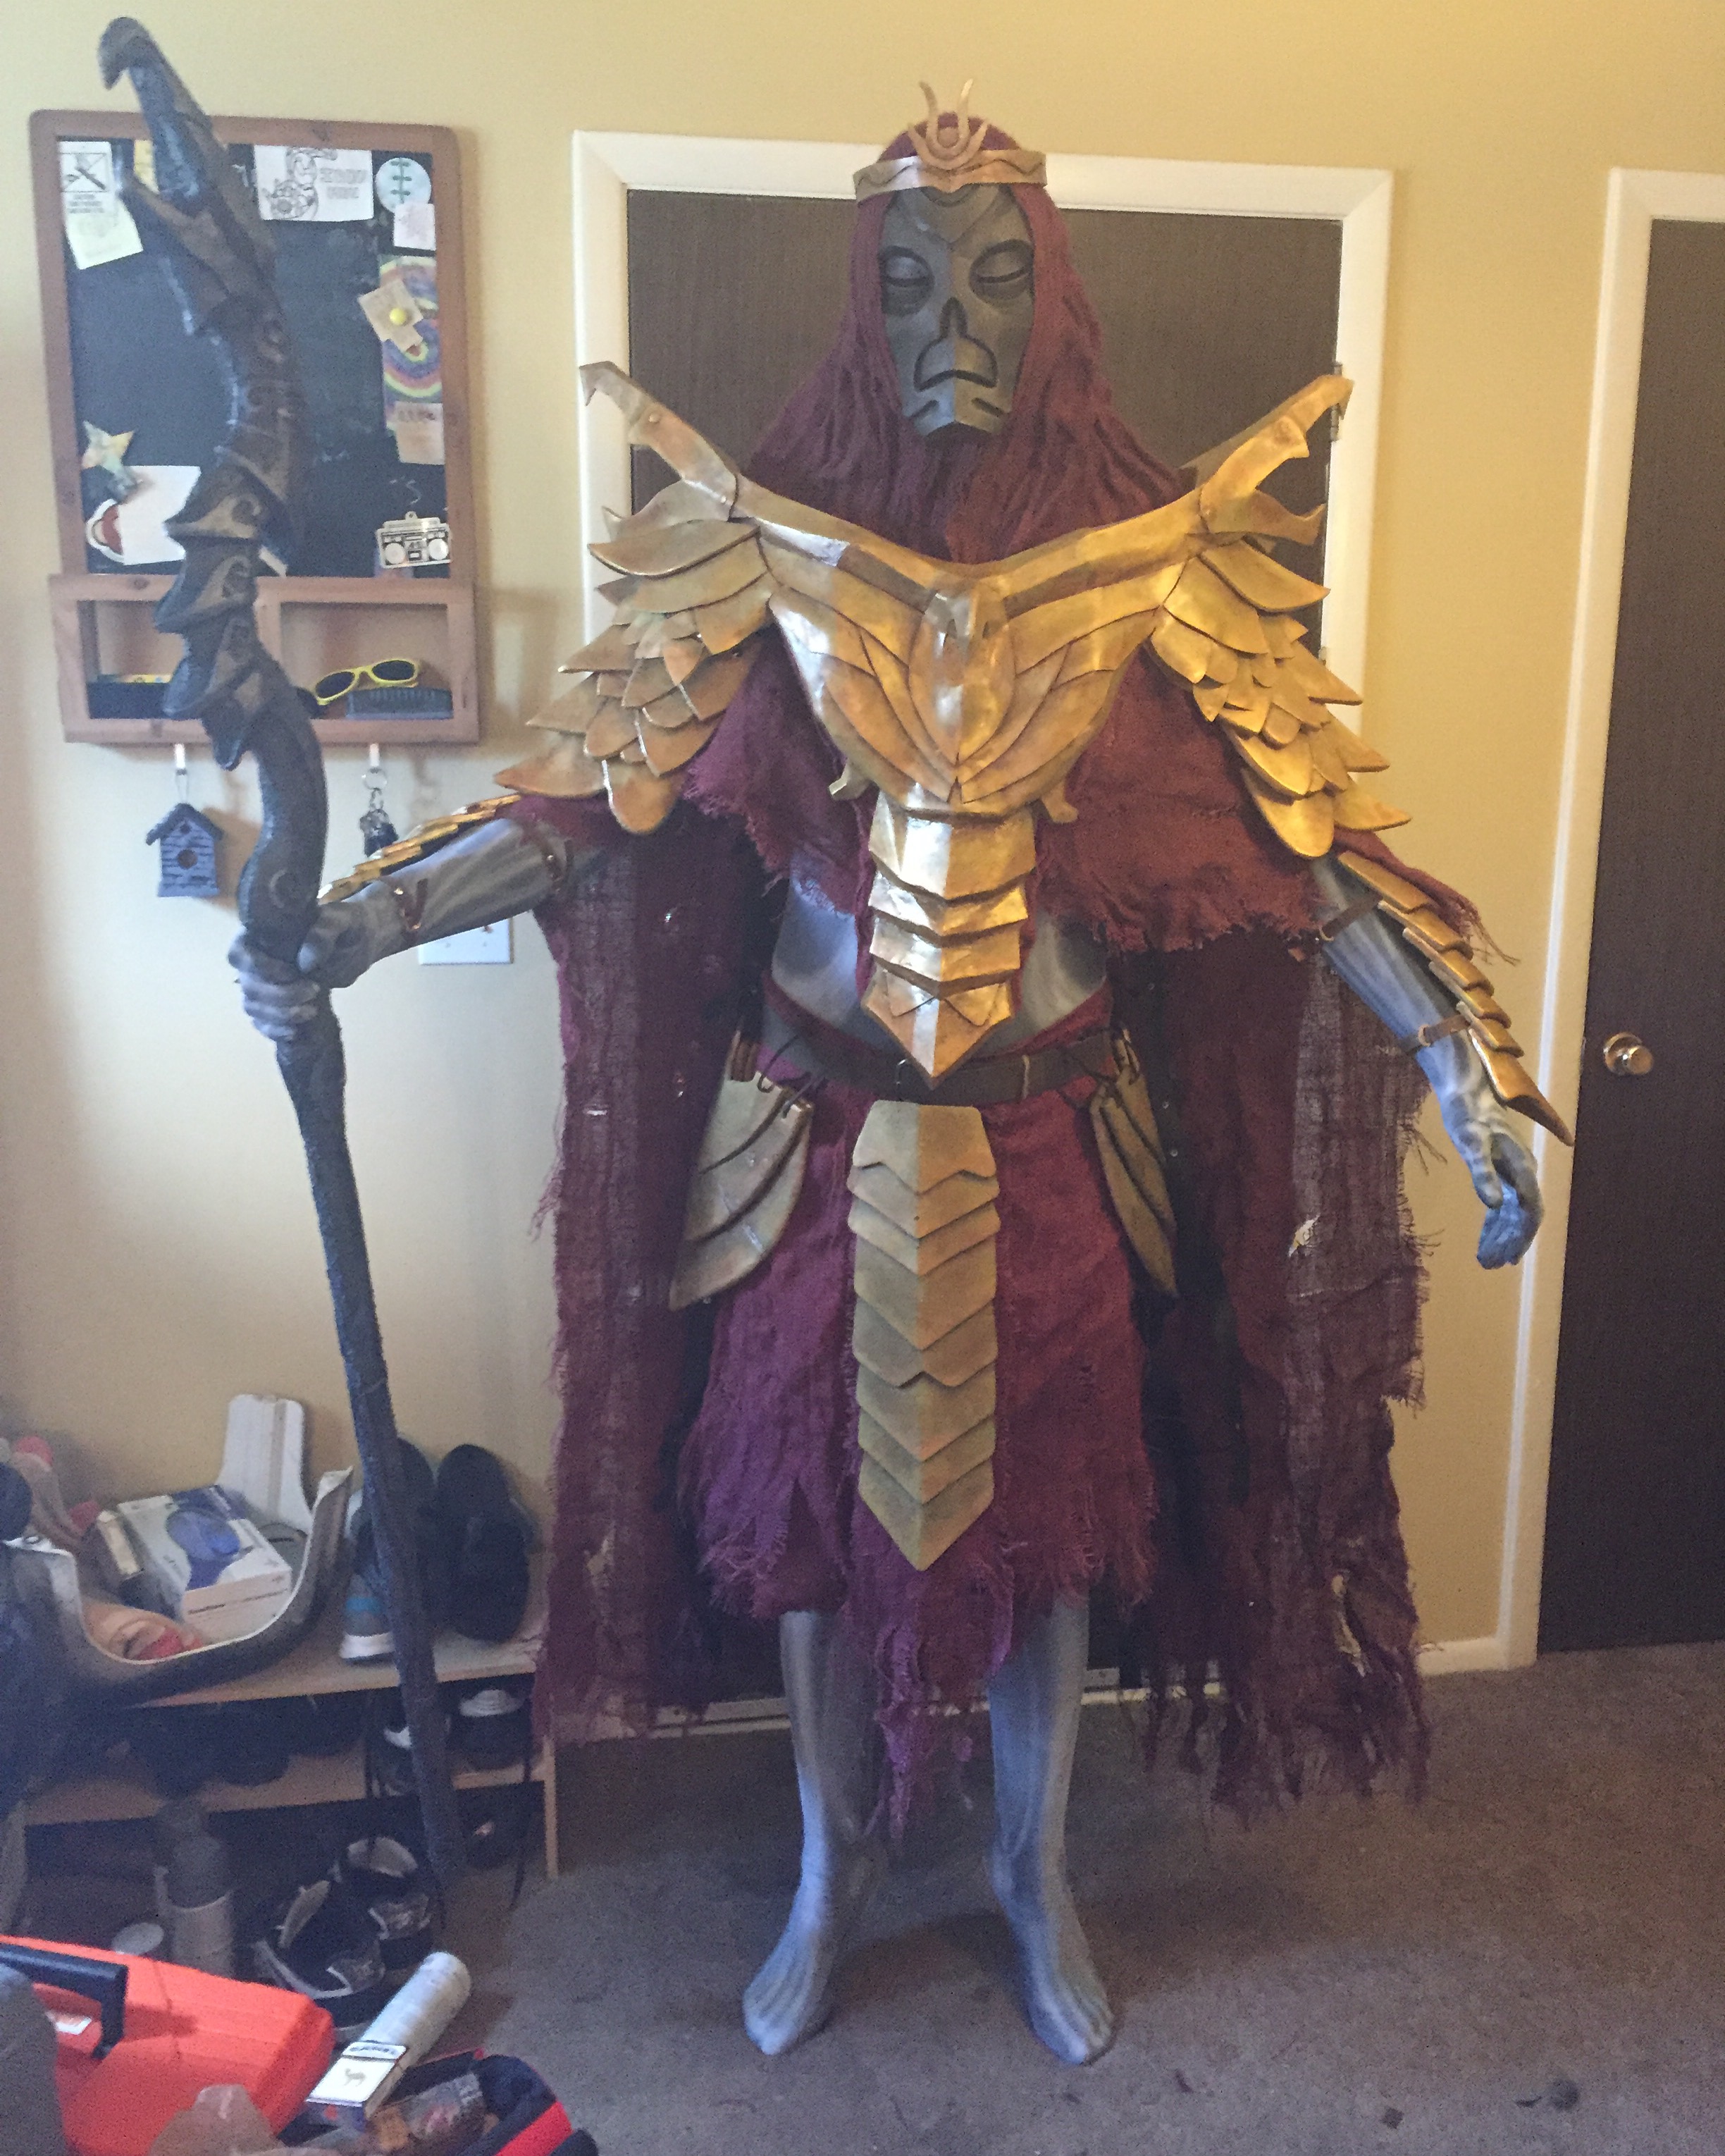 DaniStitches wrote "I love cosplaying so much and I really wanted to share a cosplay experience with my bf. He's relatively introverted and doesn't particularly like cons, but I was determined to find something that he'd want to wear with me. I kept throwing out suggestions, until finally, the Dragon Priest came up and he actually seemed pretty stoked on the idea, so we ran with it."
 -
2.
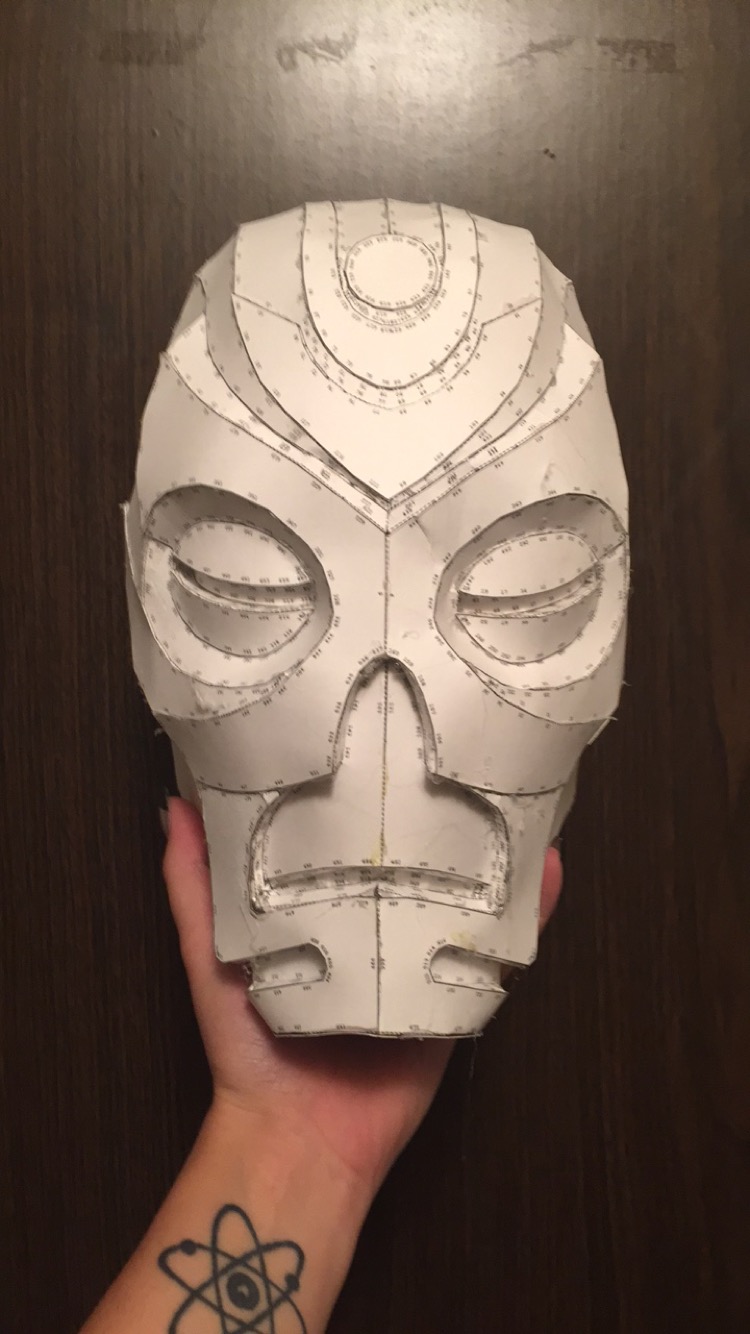 "I started by printing, cutting out, and assembling the mask using Pepakura Designer."
 -
3.
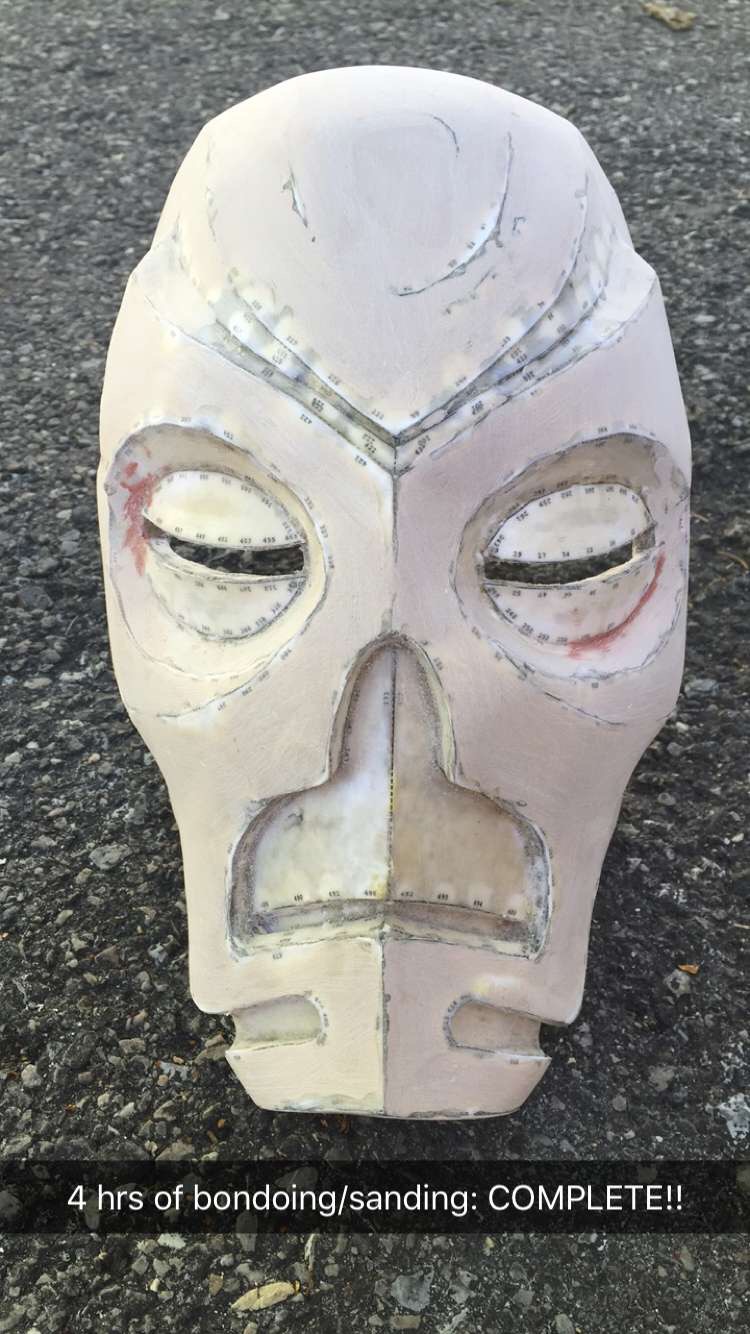 "I resined the mask, using fiberglass strips on the inside to strengthen it. Then I shaped the mask with Bondo and lots of sanding. This took a long time because the mask is smooth (unlike my Daedric armor, which looks better with all the knicks/imperfections) and required many small applications of Bondo to get the result I wanted."
 -
4.
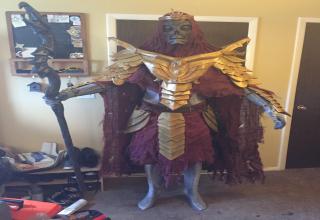
 "Elling (the bf) really likes Hevnoraak, so I aimed for that look. The detailing on the forehead is 3mm EVA foam. For paint, I primed it with gray spray paint, flecked it with various acrylics, highlighted with silver, and weathered it with black. I used bright red acrylic around the edges to mimic the red glow. After this, I covered the eye/mouth slits with utility fabric from JoAnn's. You can see through it, but as you can imagine, it's pretty difficult (Elling was tripping over everything at the con)."
 -
5.
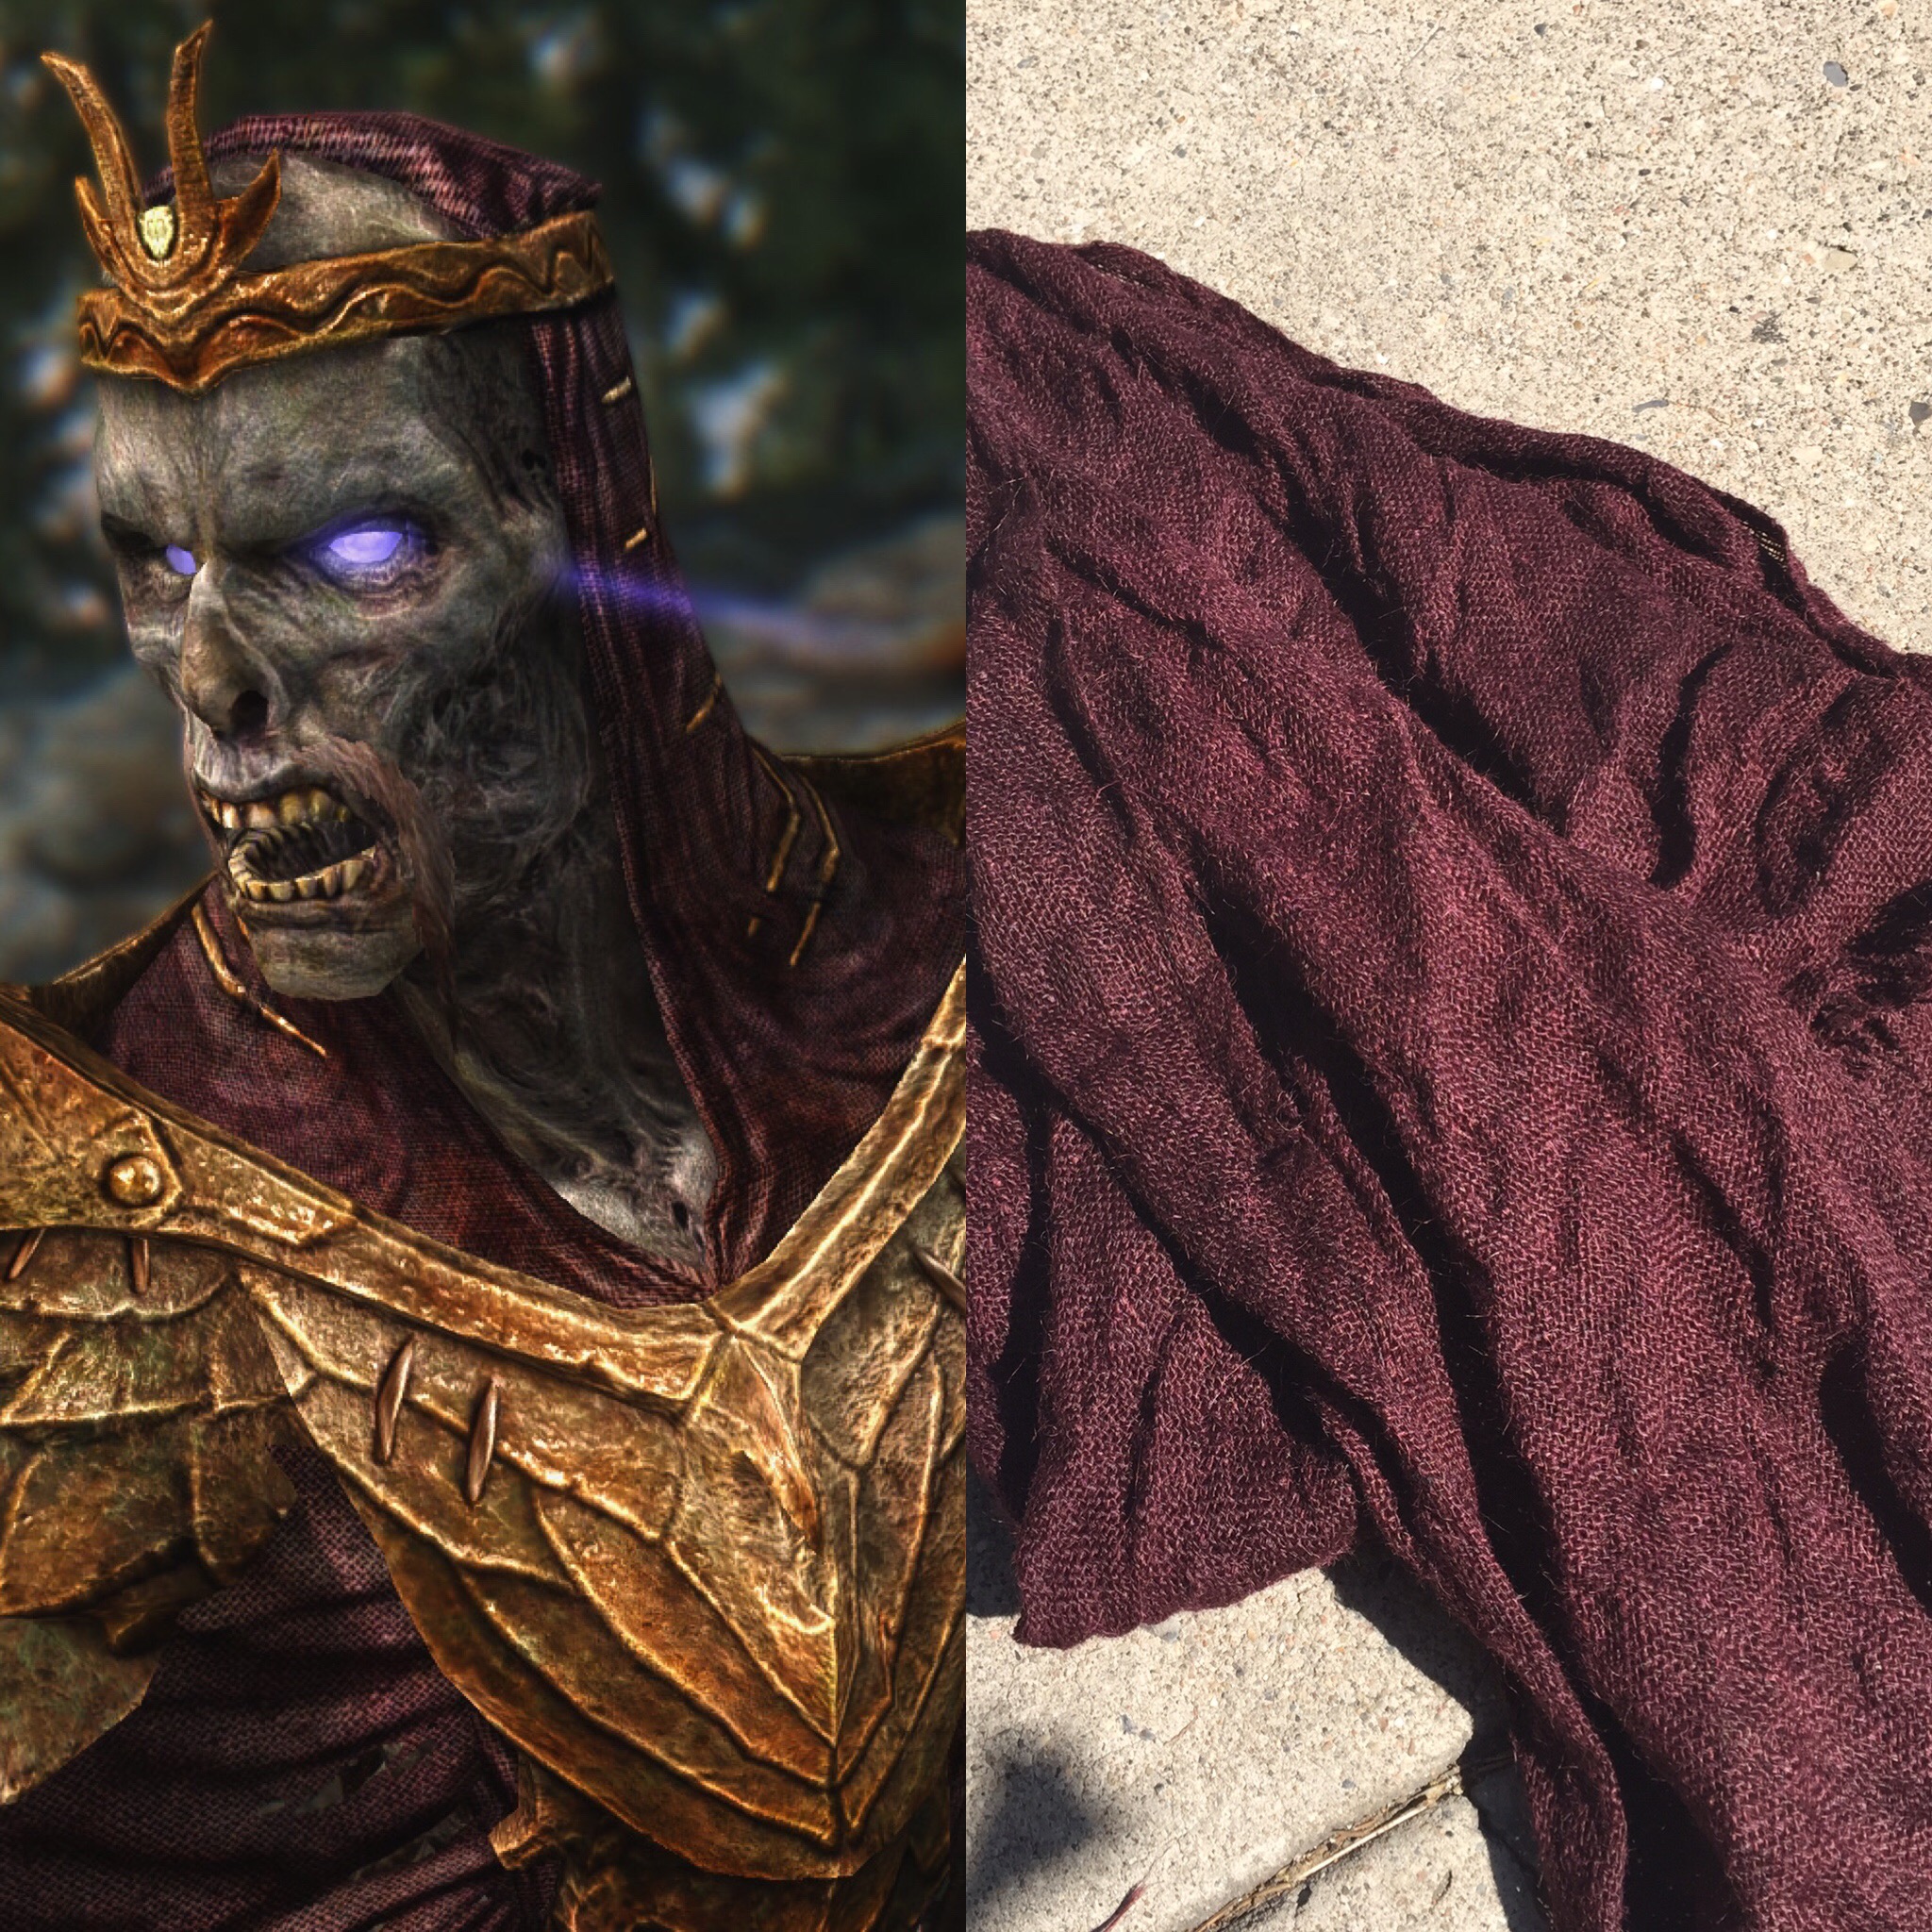 "Next up was fabric. I'm pretty sure this image is a mod, but I liked it so I went with it. For every yard of burlap, I used 1 pack of wine Rit dye, and 1/2 pack of brown. I used about 3.5 yards total."
 -
6.
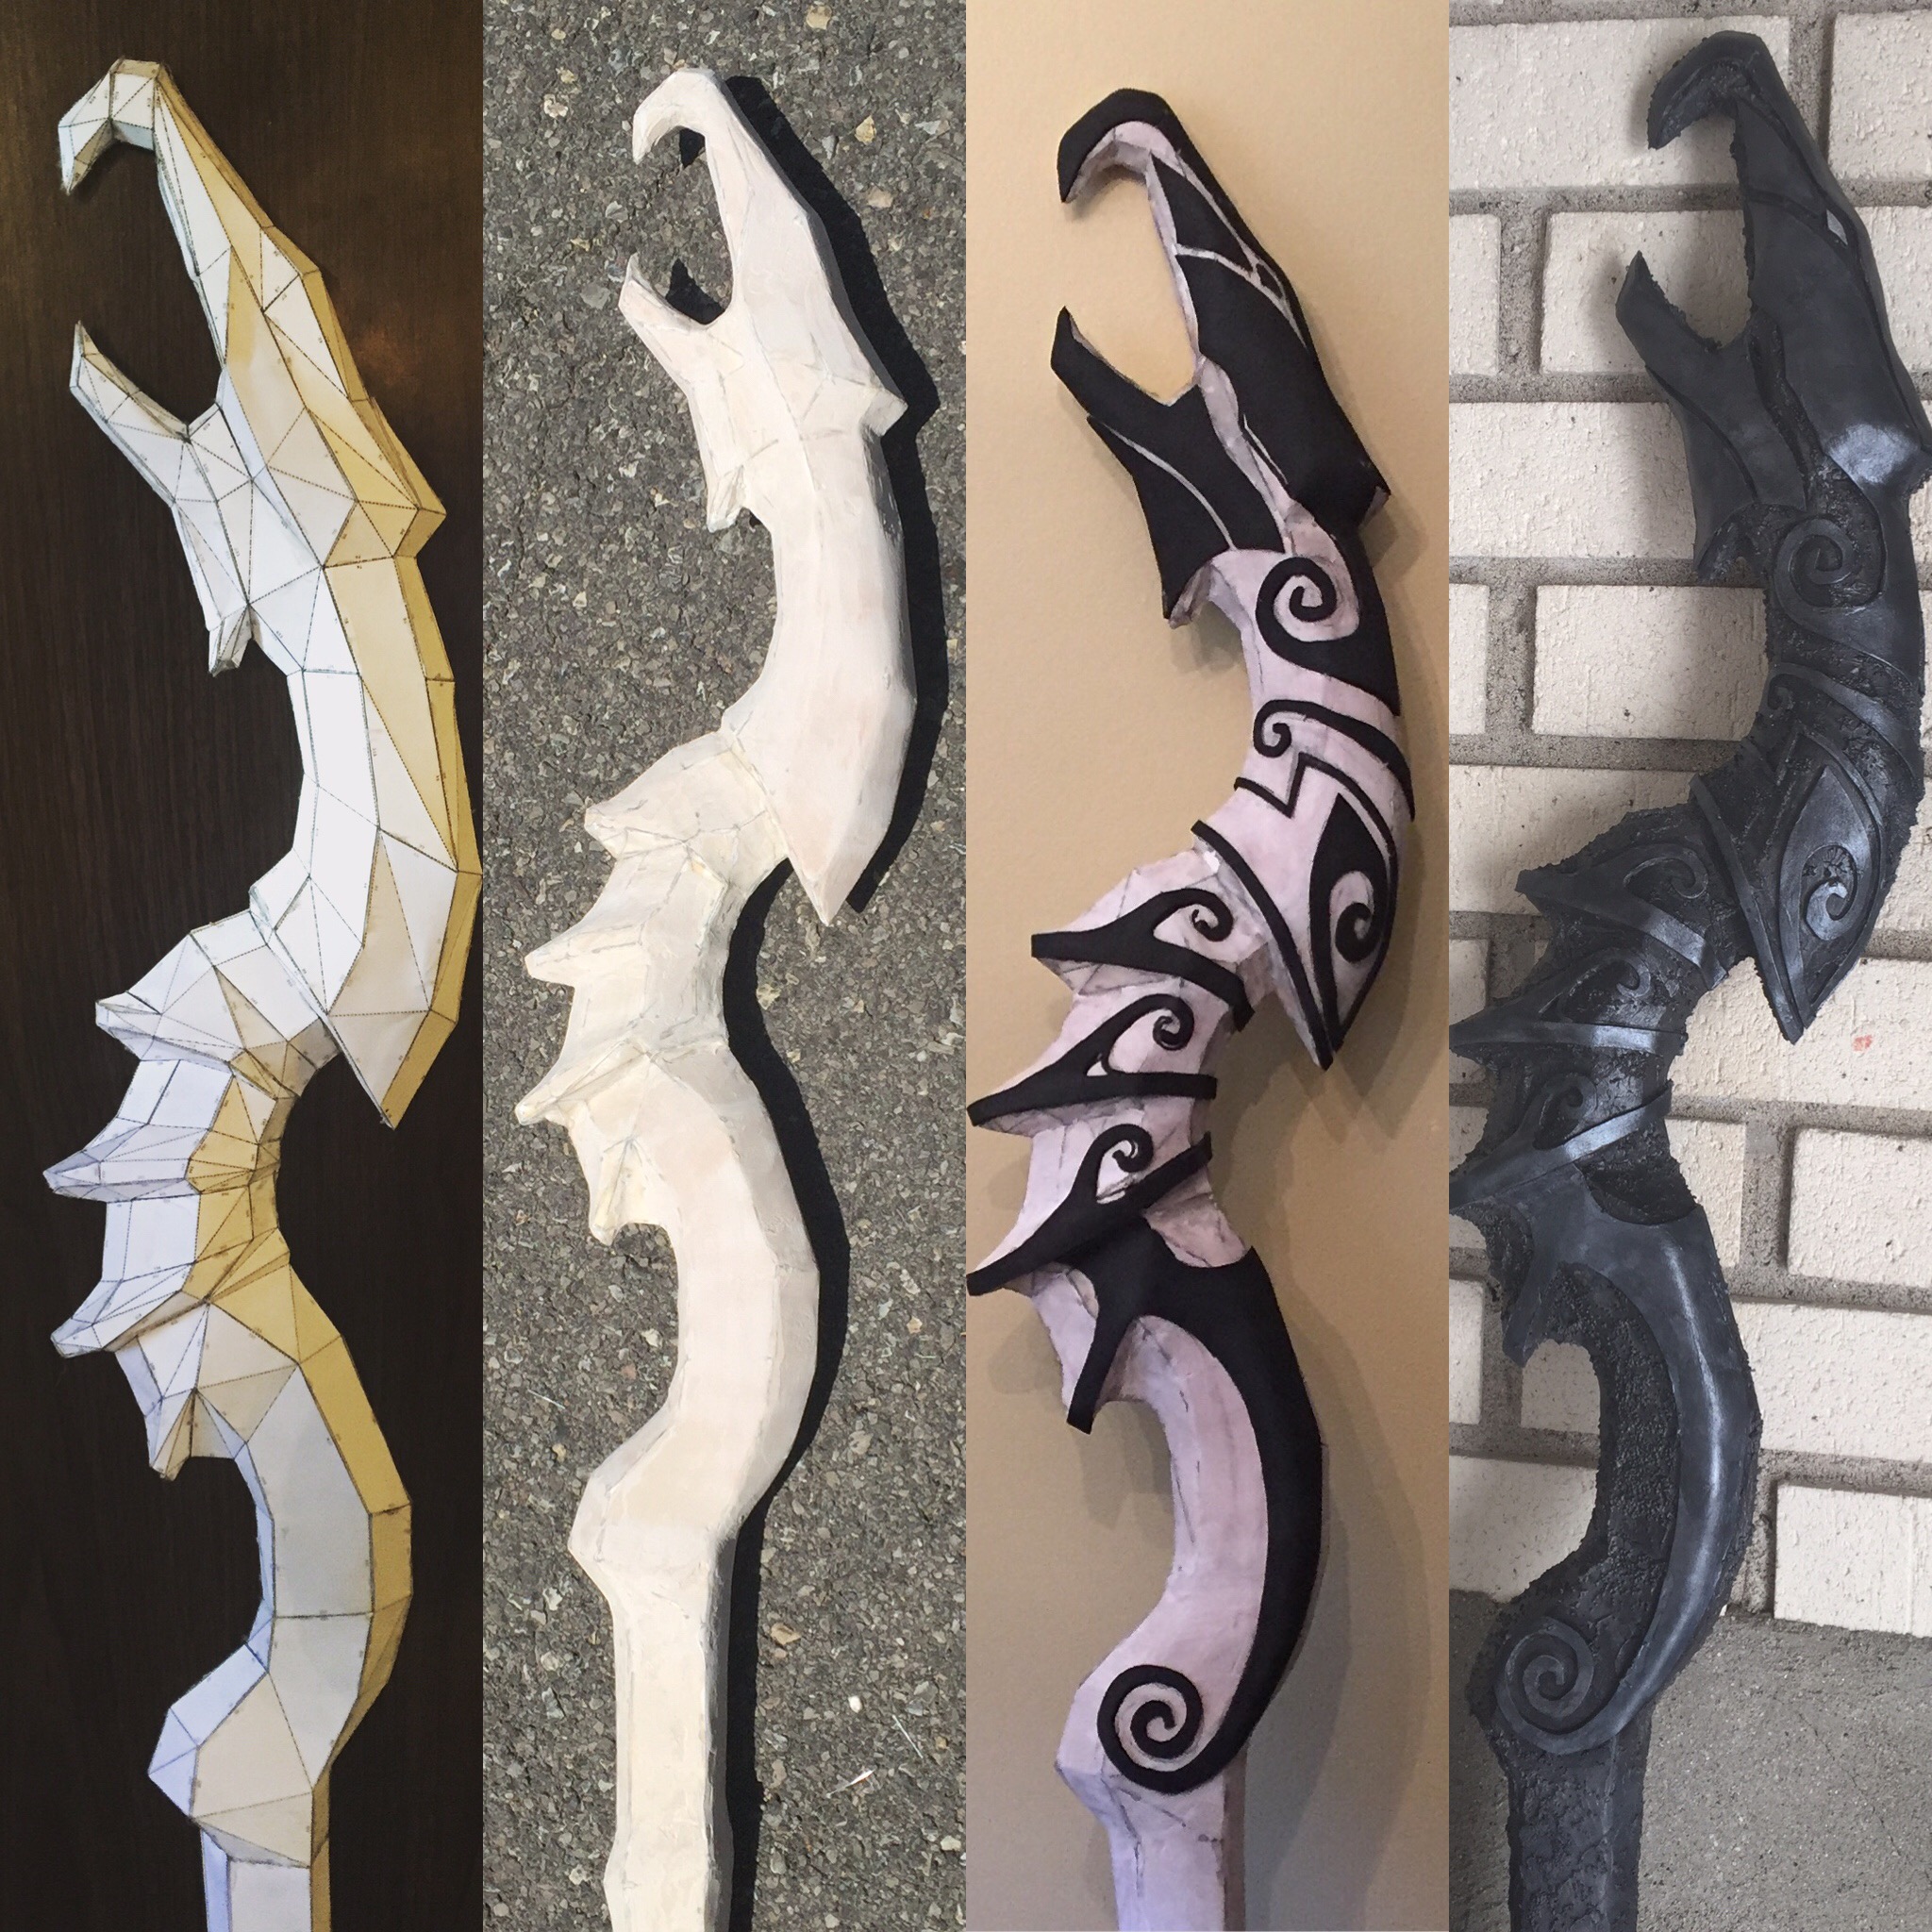 "This piece was pretty fun. I only pepped the top half of the staff and used 3/4" PVC pipe for the bottom, hiding the seam with bondo. 1.) Assembled staff pep file 2.) Resined/bondoed/sanded 3.) Detailed (with 3 mm EVA foam) 4.) Textured with glass bead paint (which I regret, don't do this if you're going to make one) and painted with black/gray/silver acrylic."
 -
7.
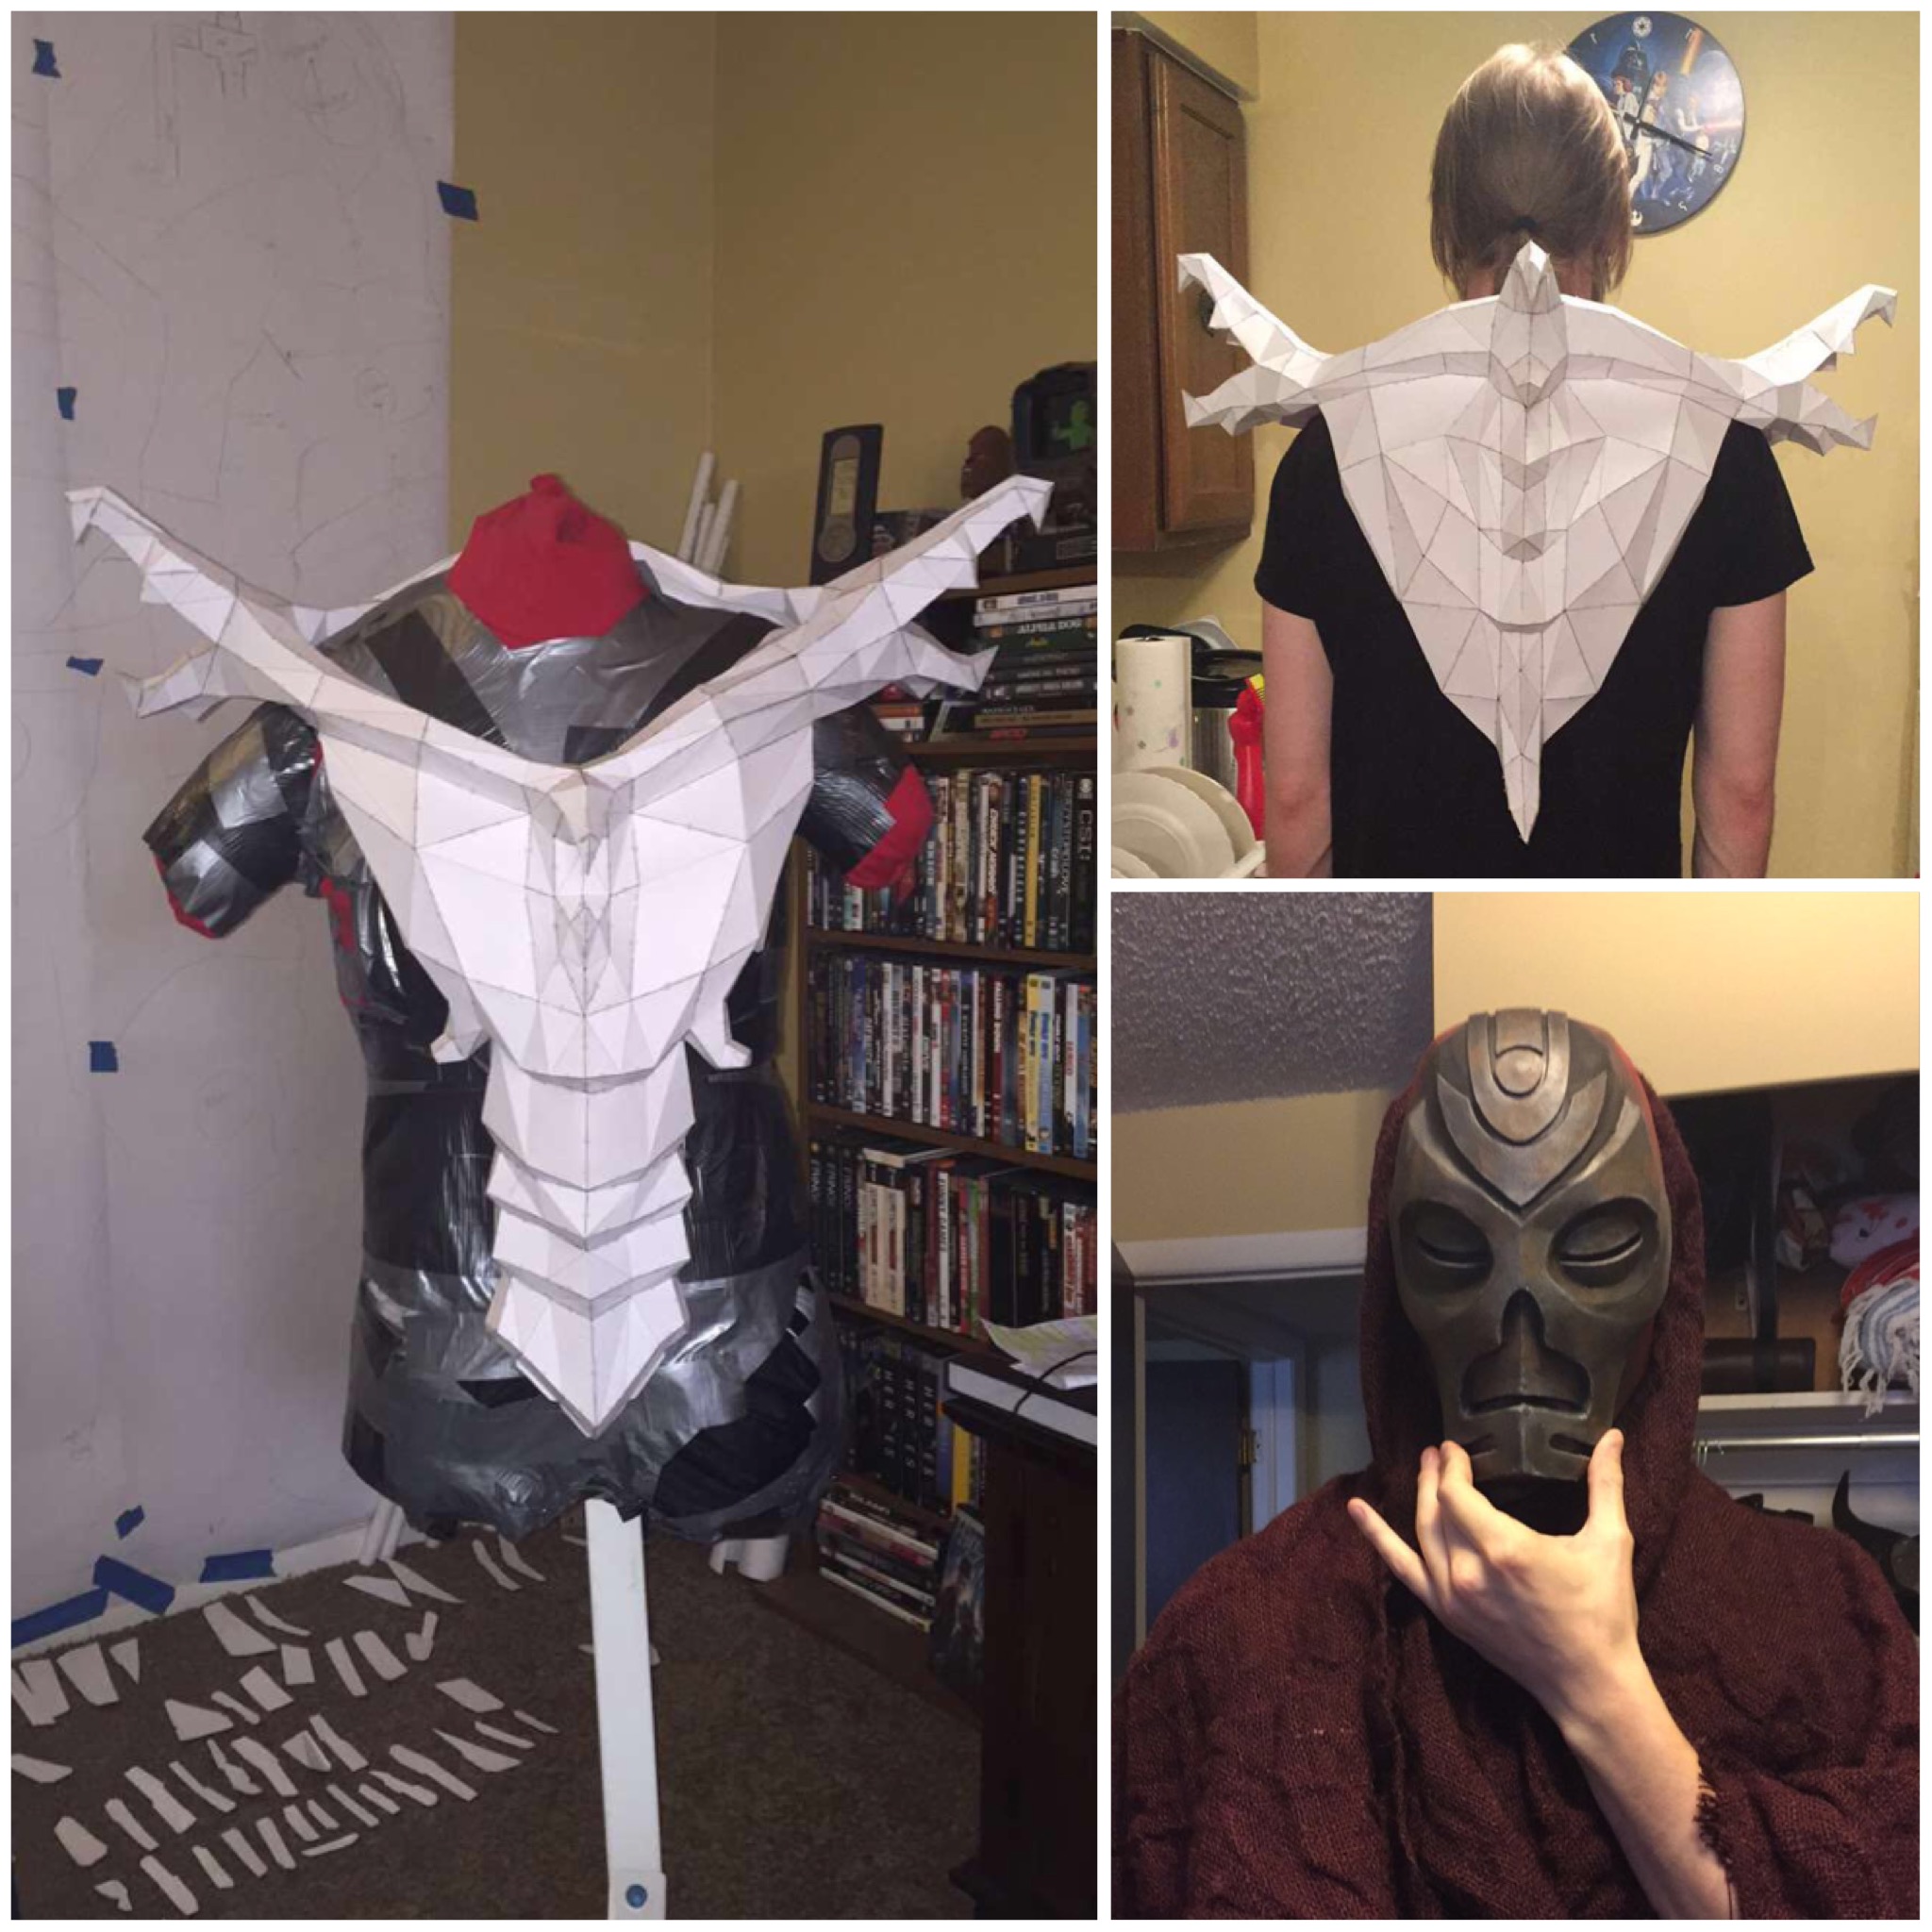 "Here's the pepped cuirass. Luckily, I scaled the pep file correctly the first time because this file was a monster to assemble."
 -
8.
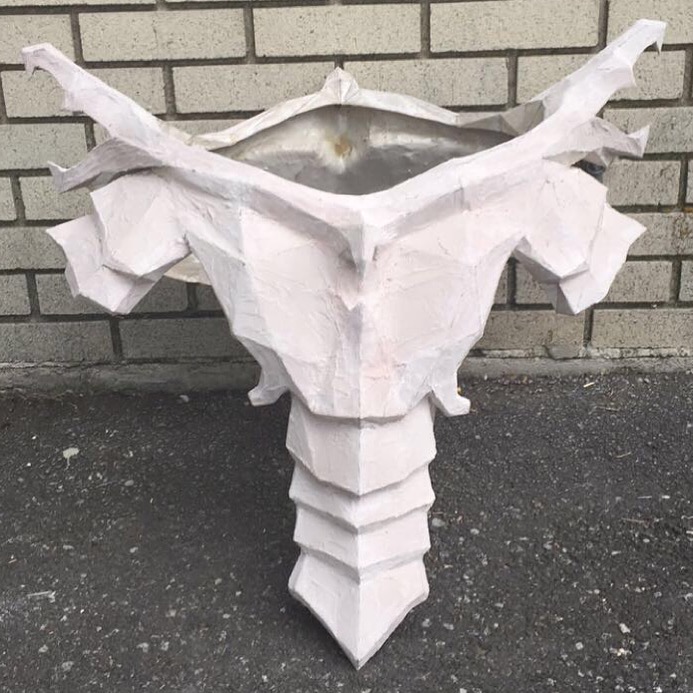 "This was taken in the midst of the bondo-sand-repeat process. I planned on detailing the entire cuirass with EVA foam, so the bondo-job didn't have to be perfect like the mask, but it still took a lot of elbow grease."
 -
9.
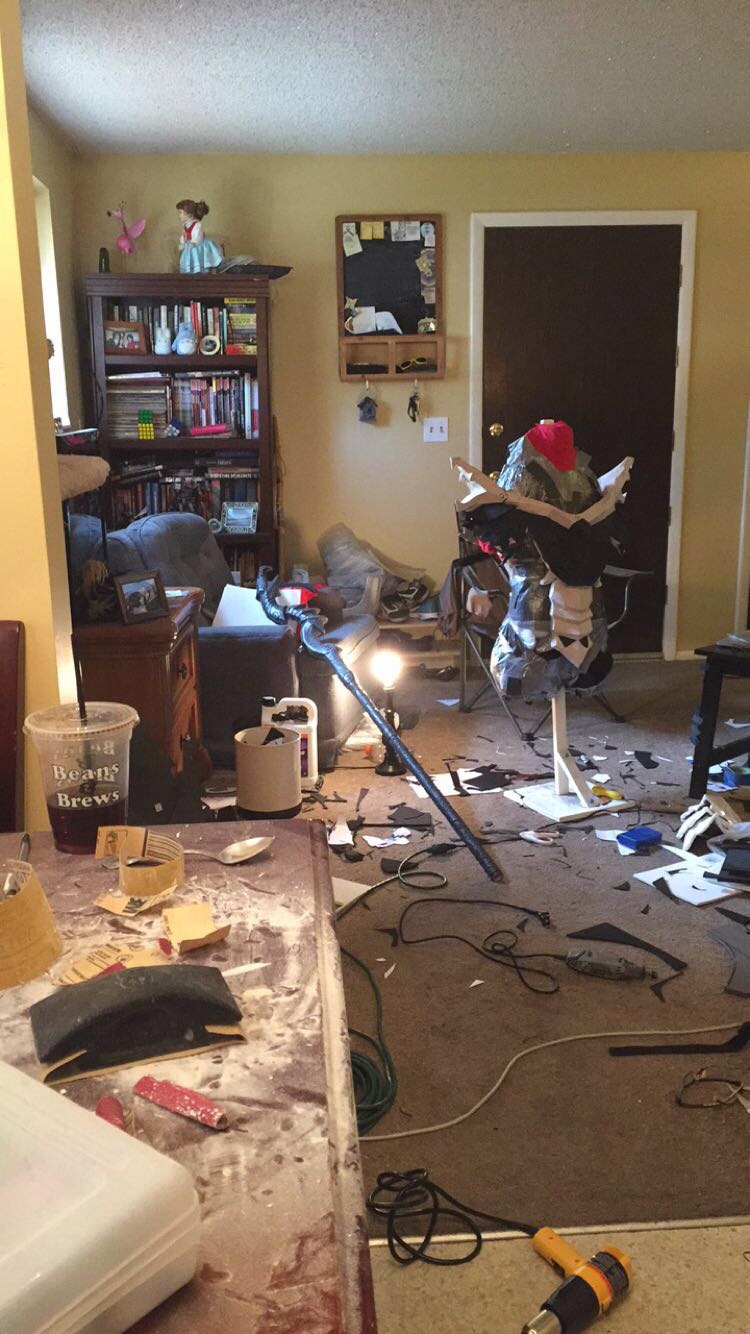 "The state of my living room as I added the foam detailing to the cuirass. Tbh, it looked like this for about two weeks. haha I really don't know how anybody can remain organized while building a set of armor."
 -
10.
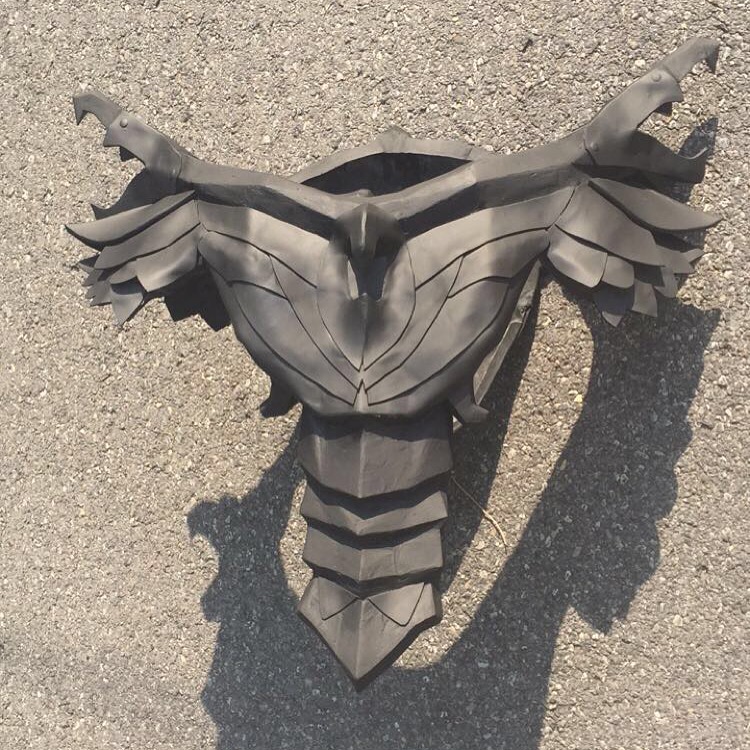 "Here's the detailed and primed cuirass. All the lines that you see on the chest/shoulders are layered EVA foam (3mm and 5mm). Also, I used Dap Kwik Seal to hide the seams down the center. I would highly recommend this method for hiding foam seams!"
 -
11.
 "I made the thigh plates out of EVA foam floor mats. I heat-shaped them, scuffed em up with a dremel, and started testing out different paints. In this picture, the left one just has gold primer and the right one has been weathered. This paint job looked way too much like leather armor, so I had to start over, but I eventually got it (needed more green/bronze)."
 -
12.
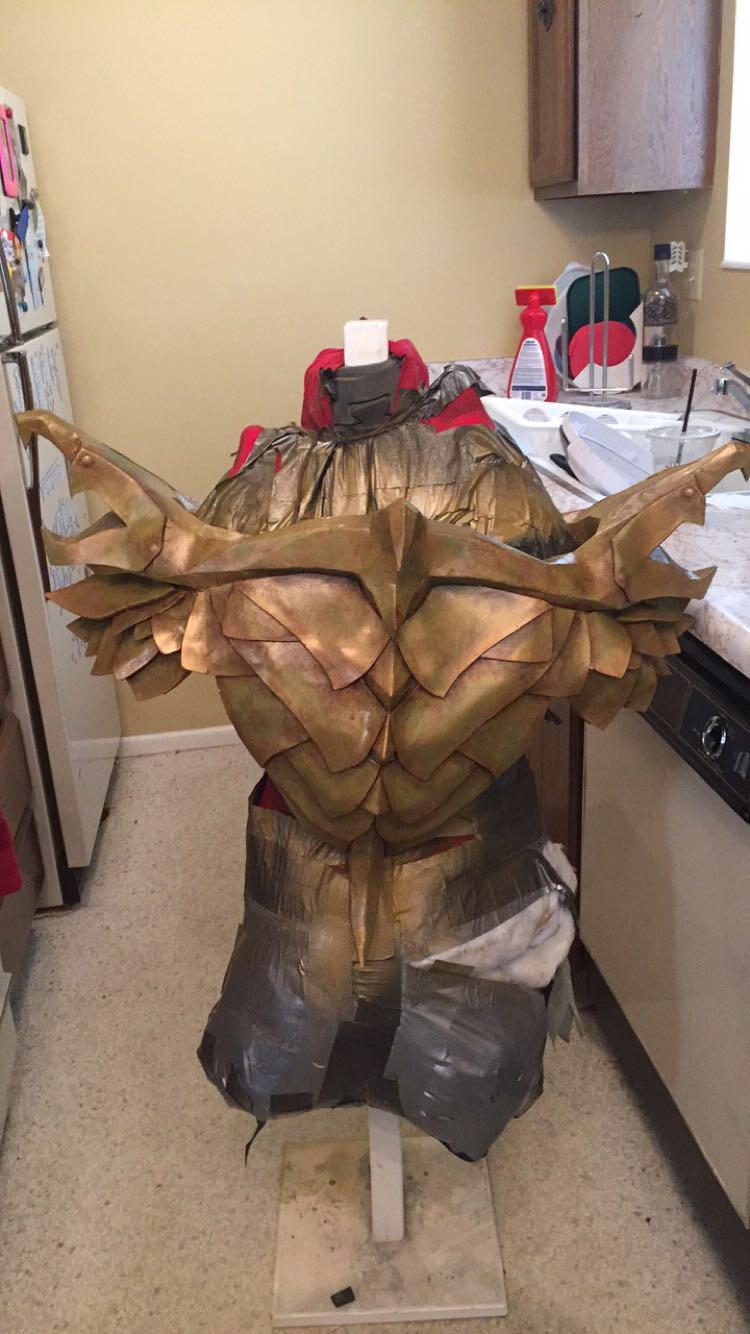 "Here's one of the only photos I have that actually shows the rusty green/dirtiness of the armor. The metallic gold spray paint I used for the base coat washes out the detailing in photographs unfortunately, but not in person, at least!"
 -
13.
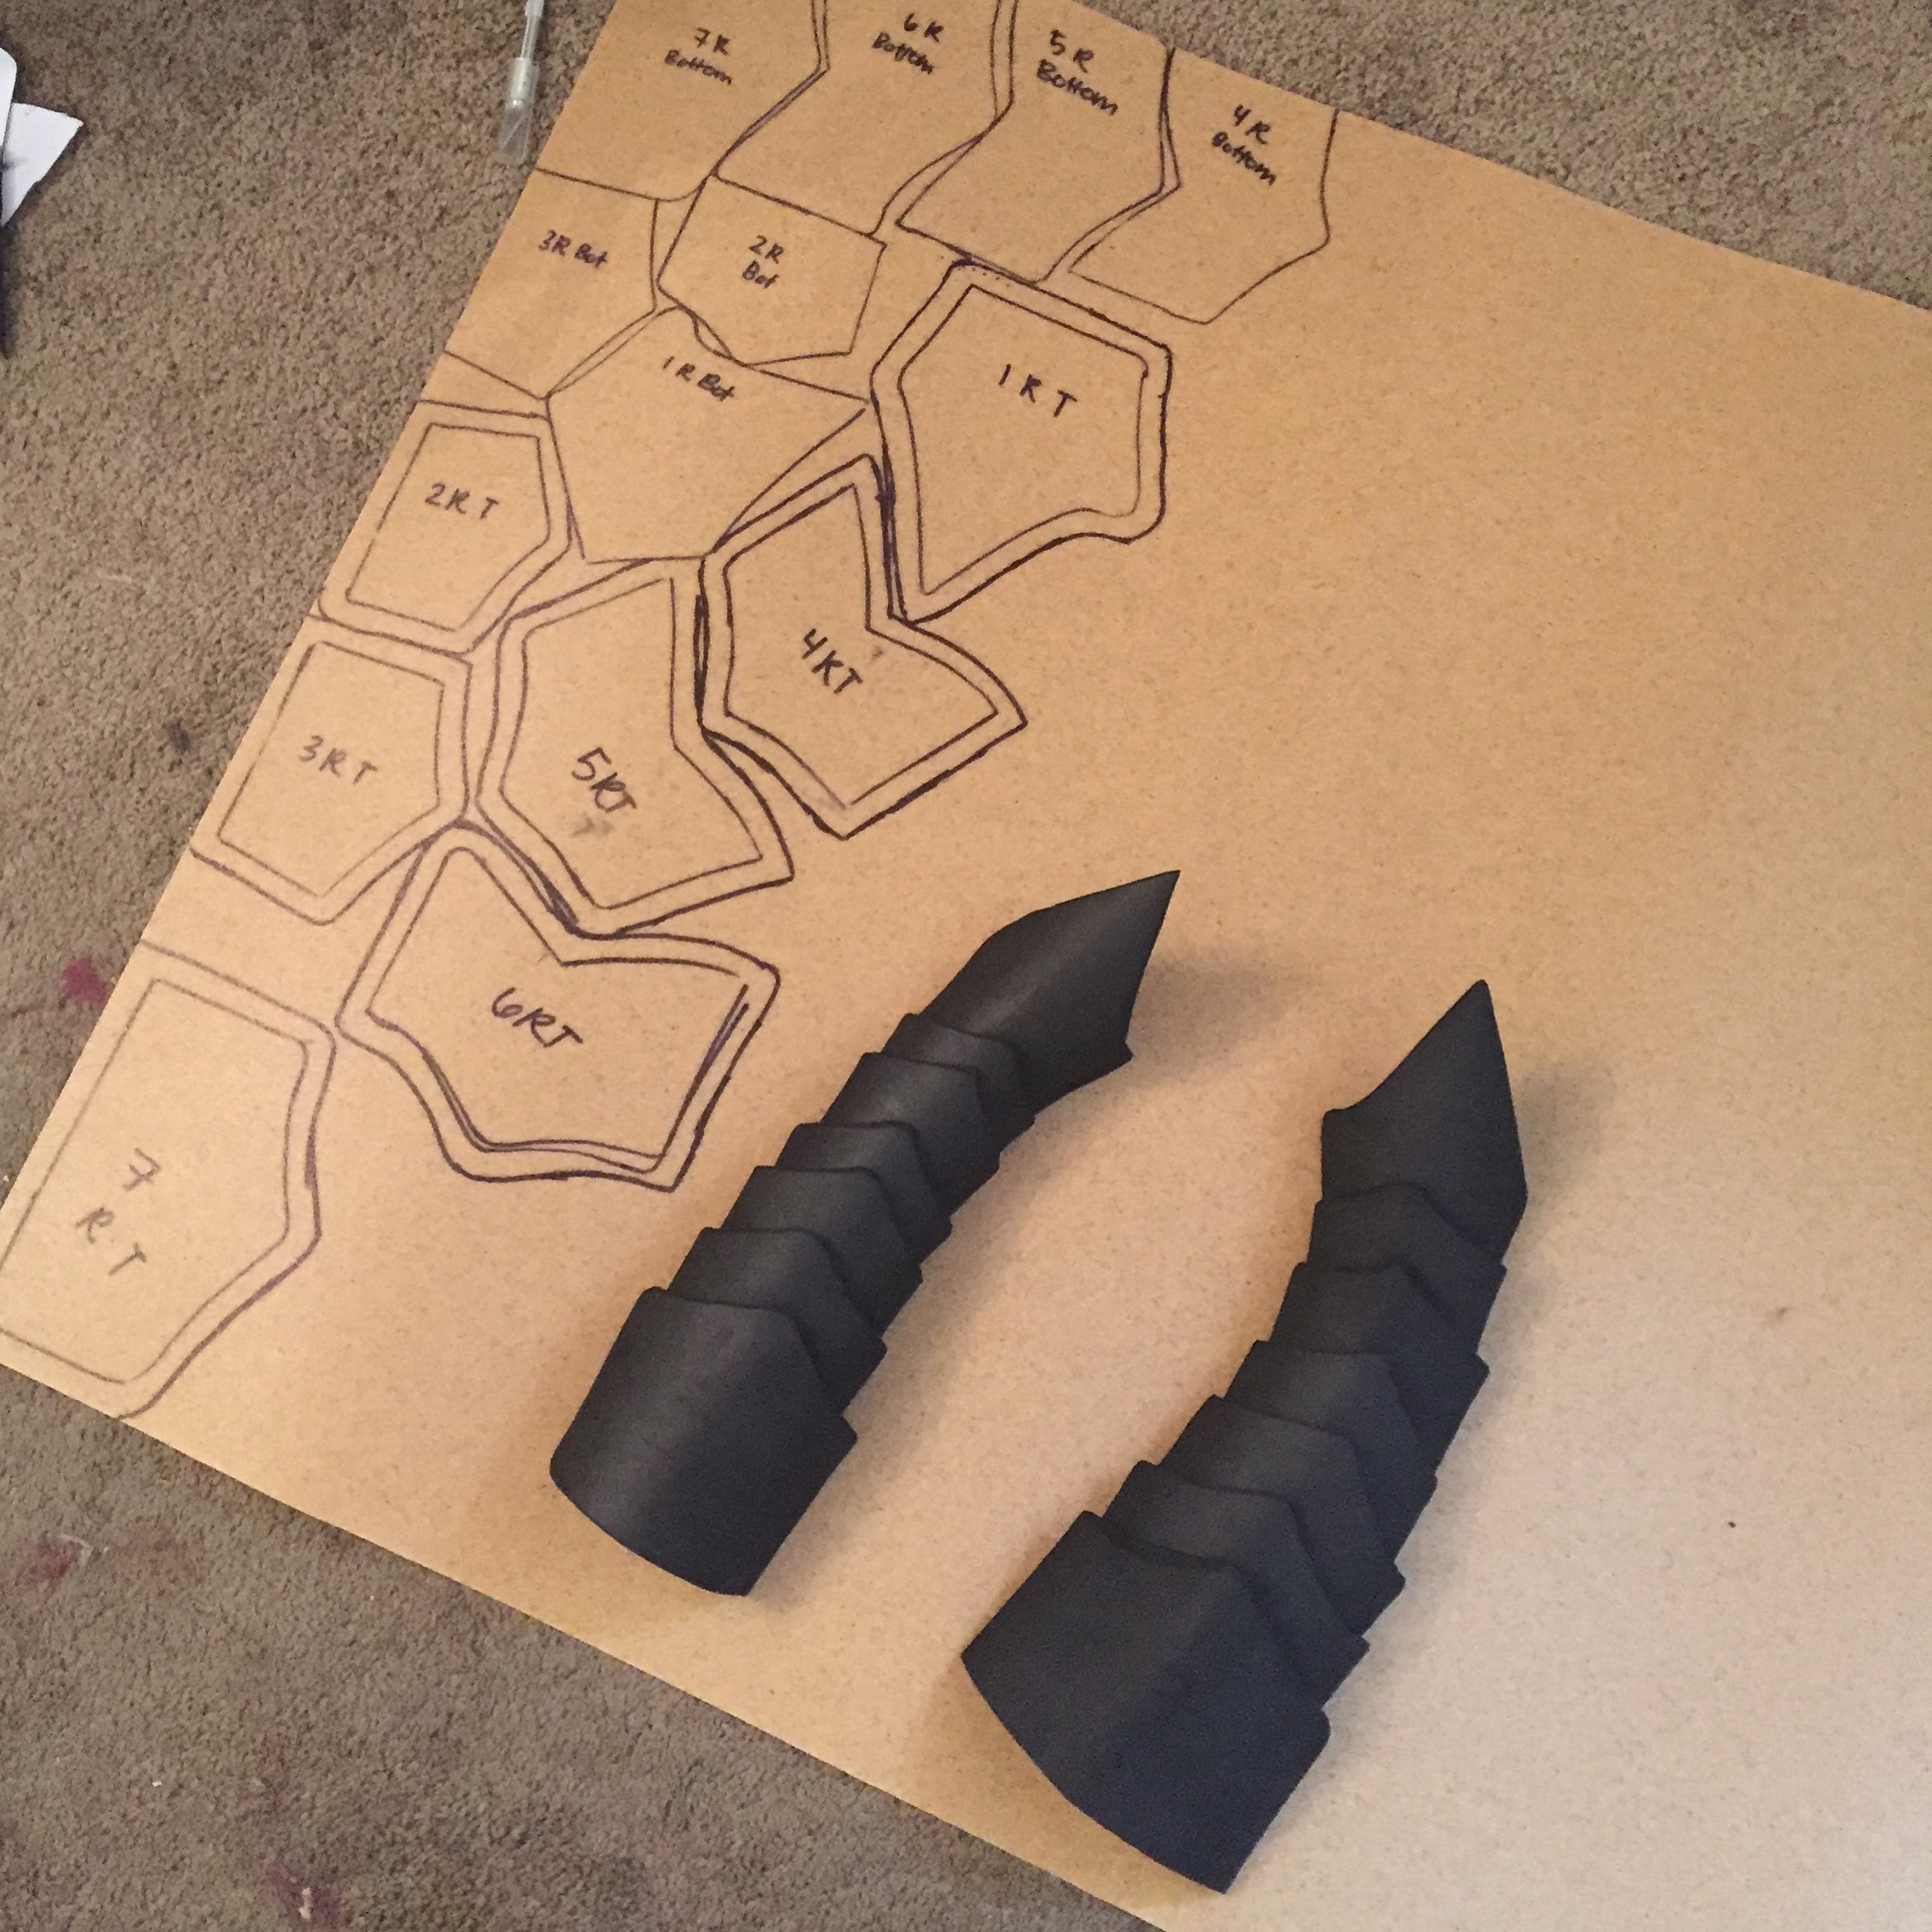 "I was going to pep the bracers/upper arms, but then realized I could save about 25 hours of work by going the worbla/foam route. I made some templates, heat formed 5mm foam to Elling's arms (not as bad as it sounds), and used the worbla sandwich method."
 -
14.
 "Here are the upper arms. Making the templates for these was a little frustrating, but still infinitely better than pepping them."
 -
15.
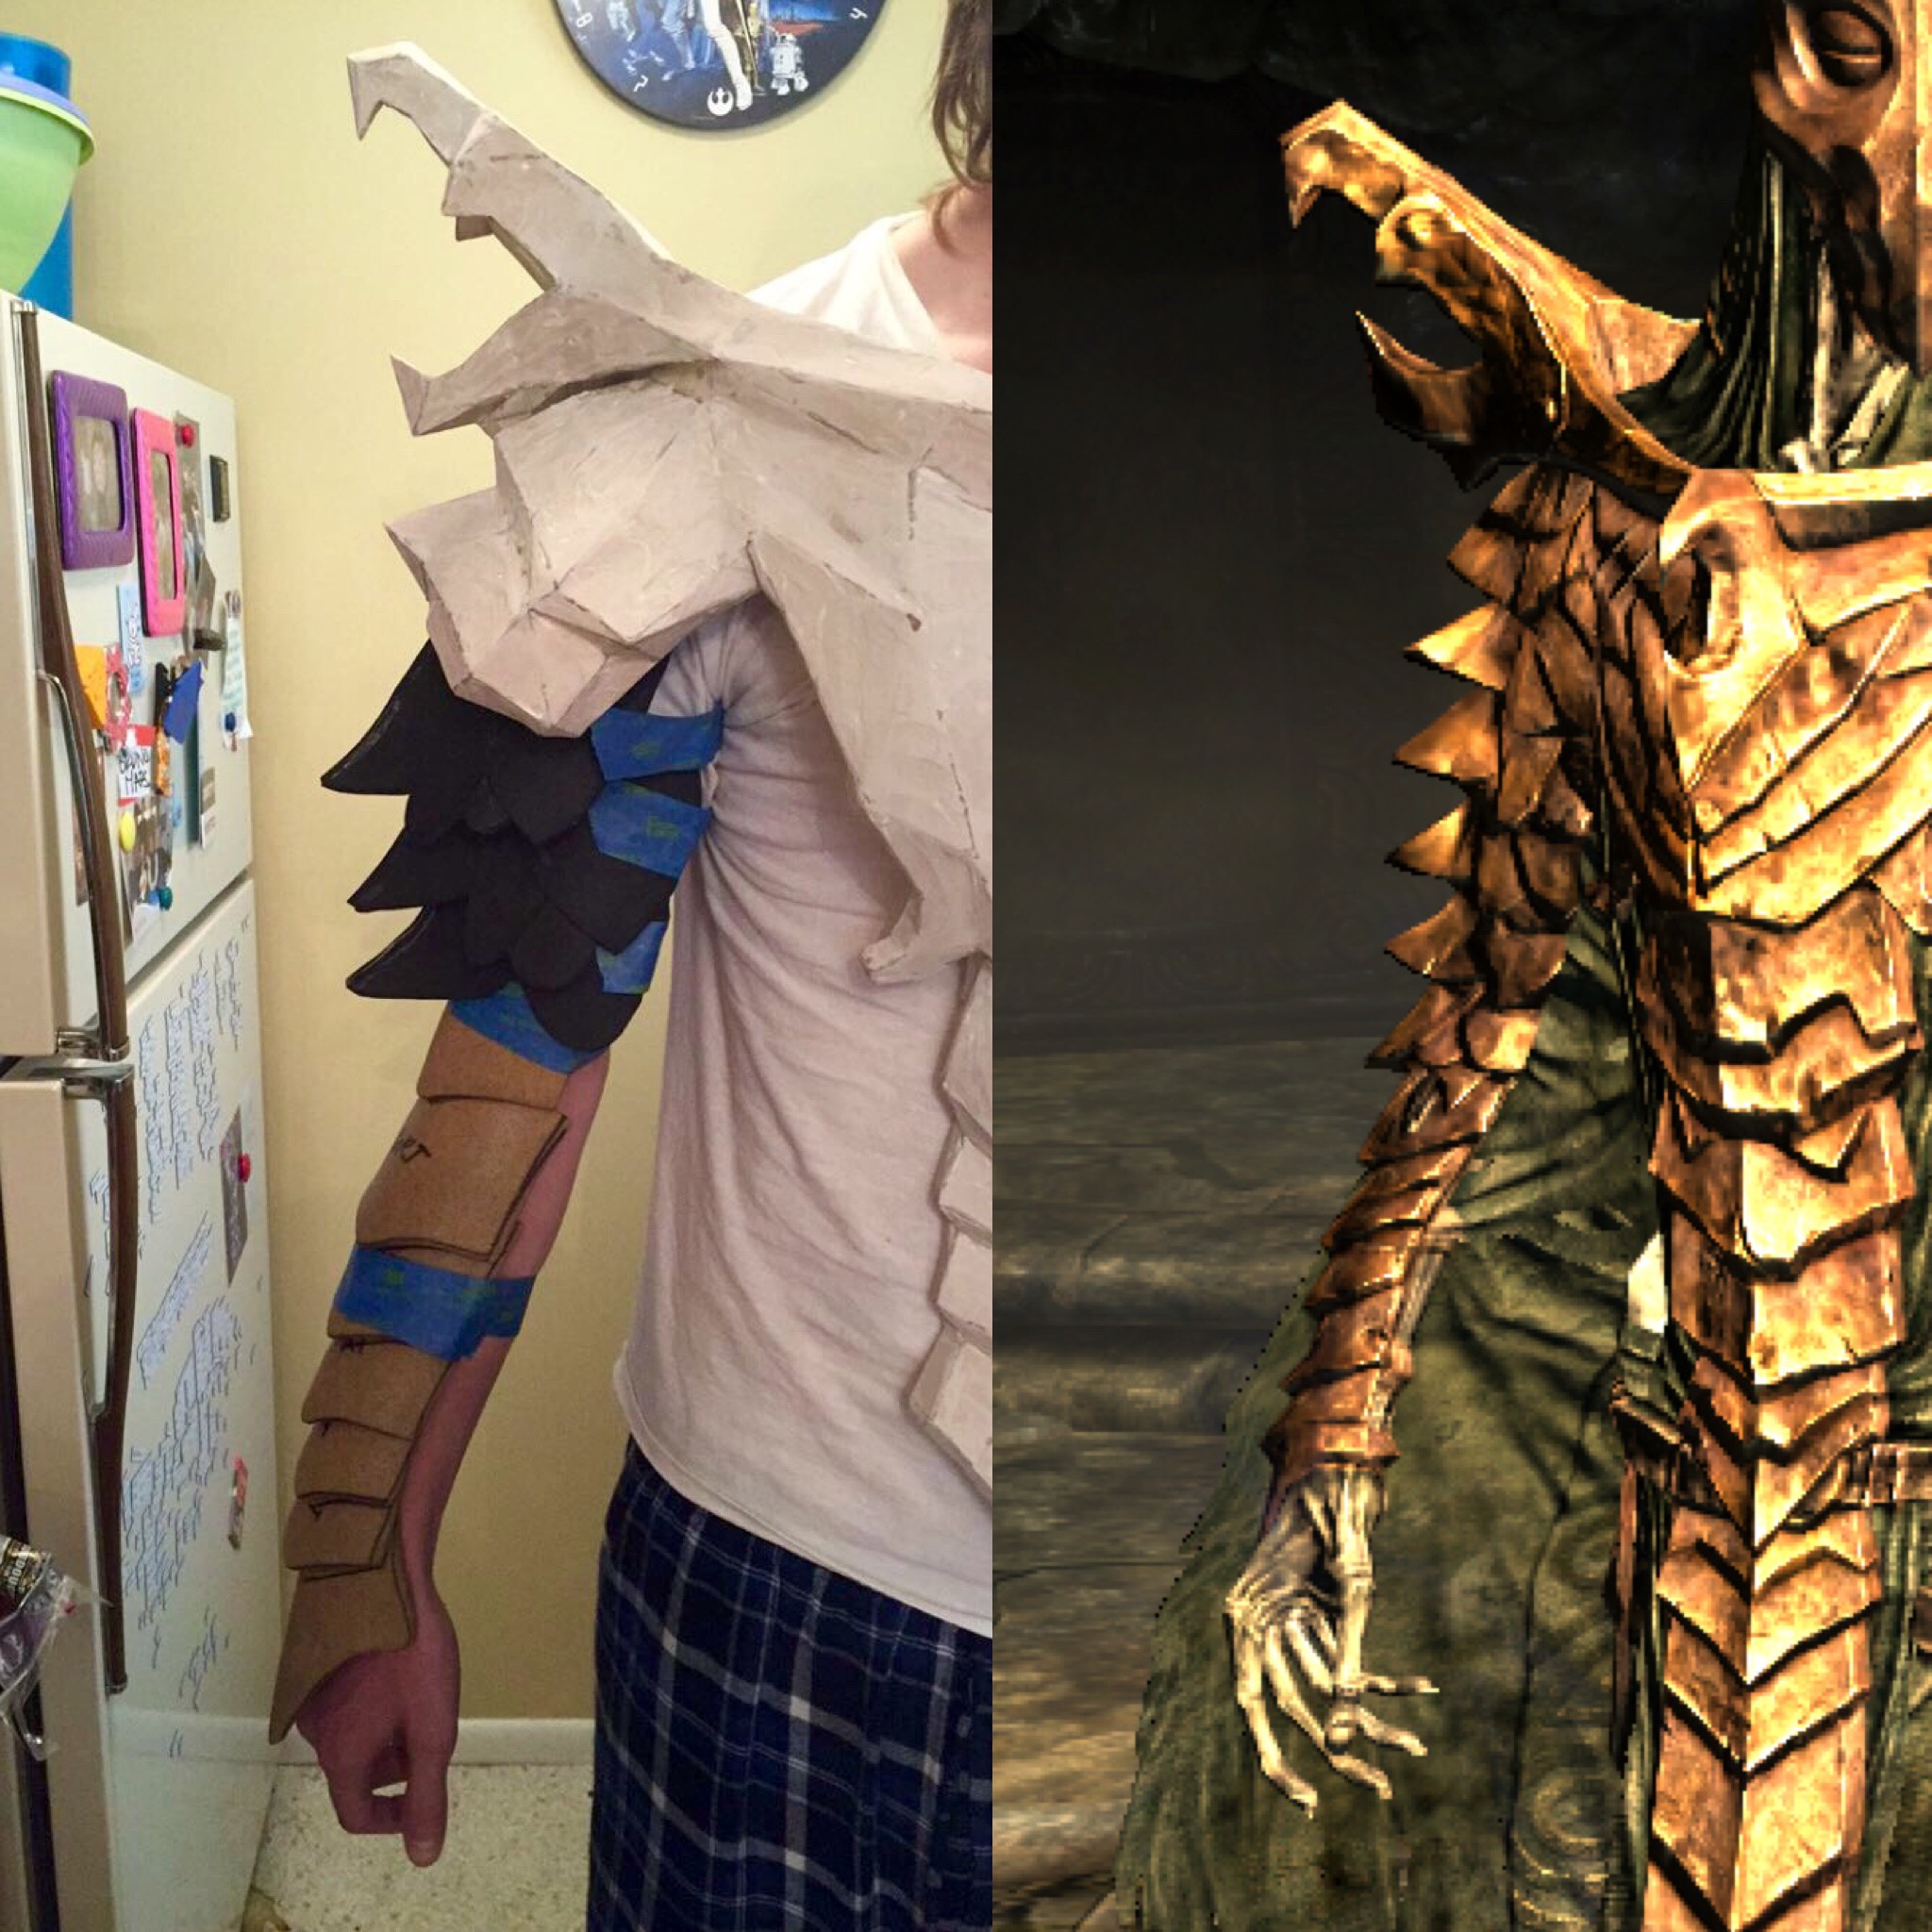 "Bracers/Upper Arm test-fit. This is when I started getting really excited- the costume was starting to come together!"
 -
16.
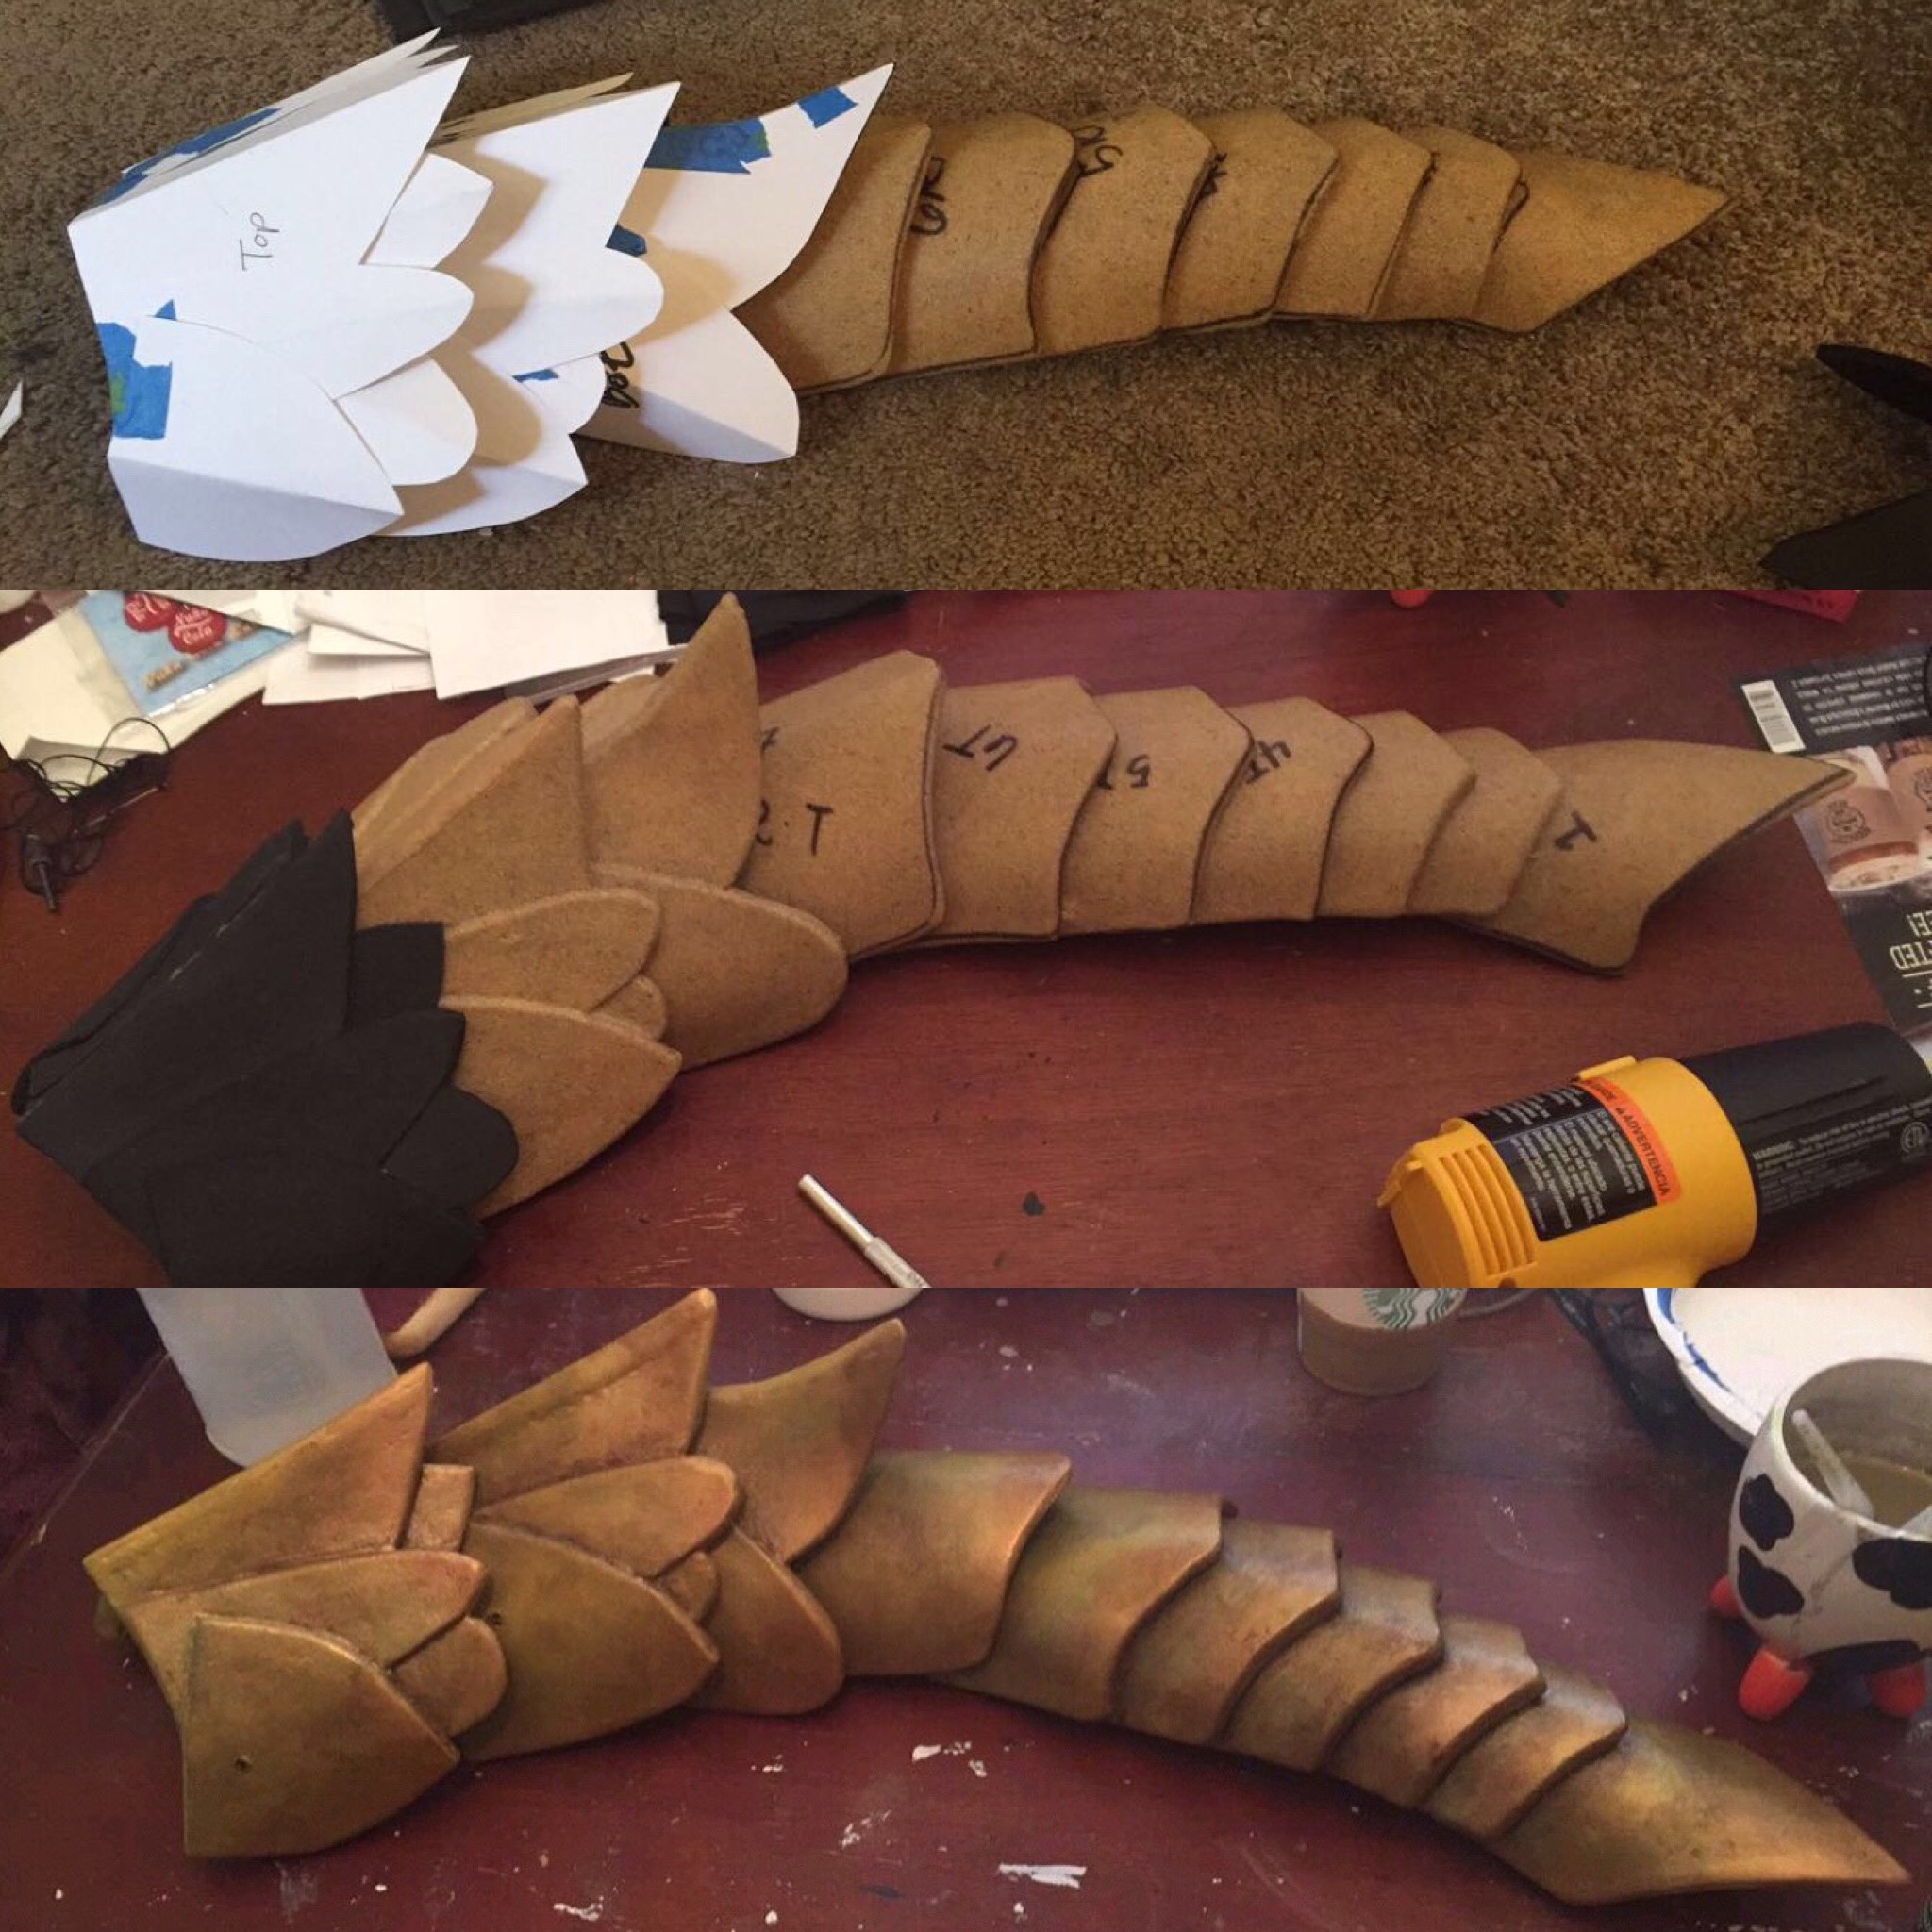 "1.) Worbla bracers + upper arm templates 2.) Progress on the upper arms! 3.) 10 coats of gesso, a lot of sanding, and a paint job later, this is the result!"
 -
17.
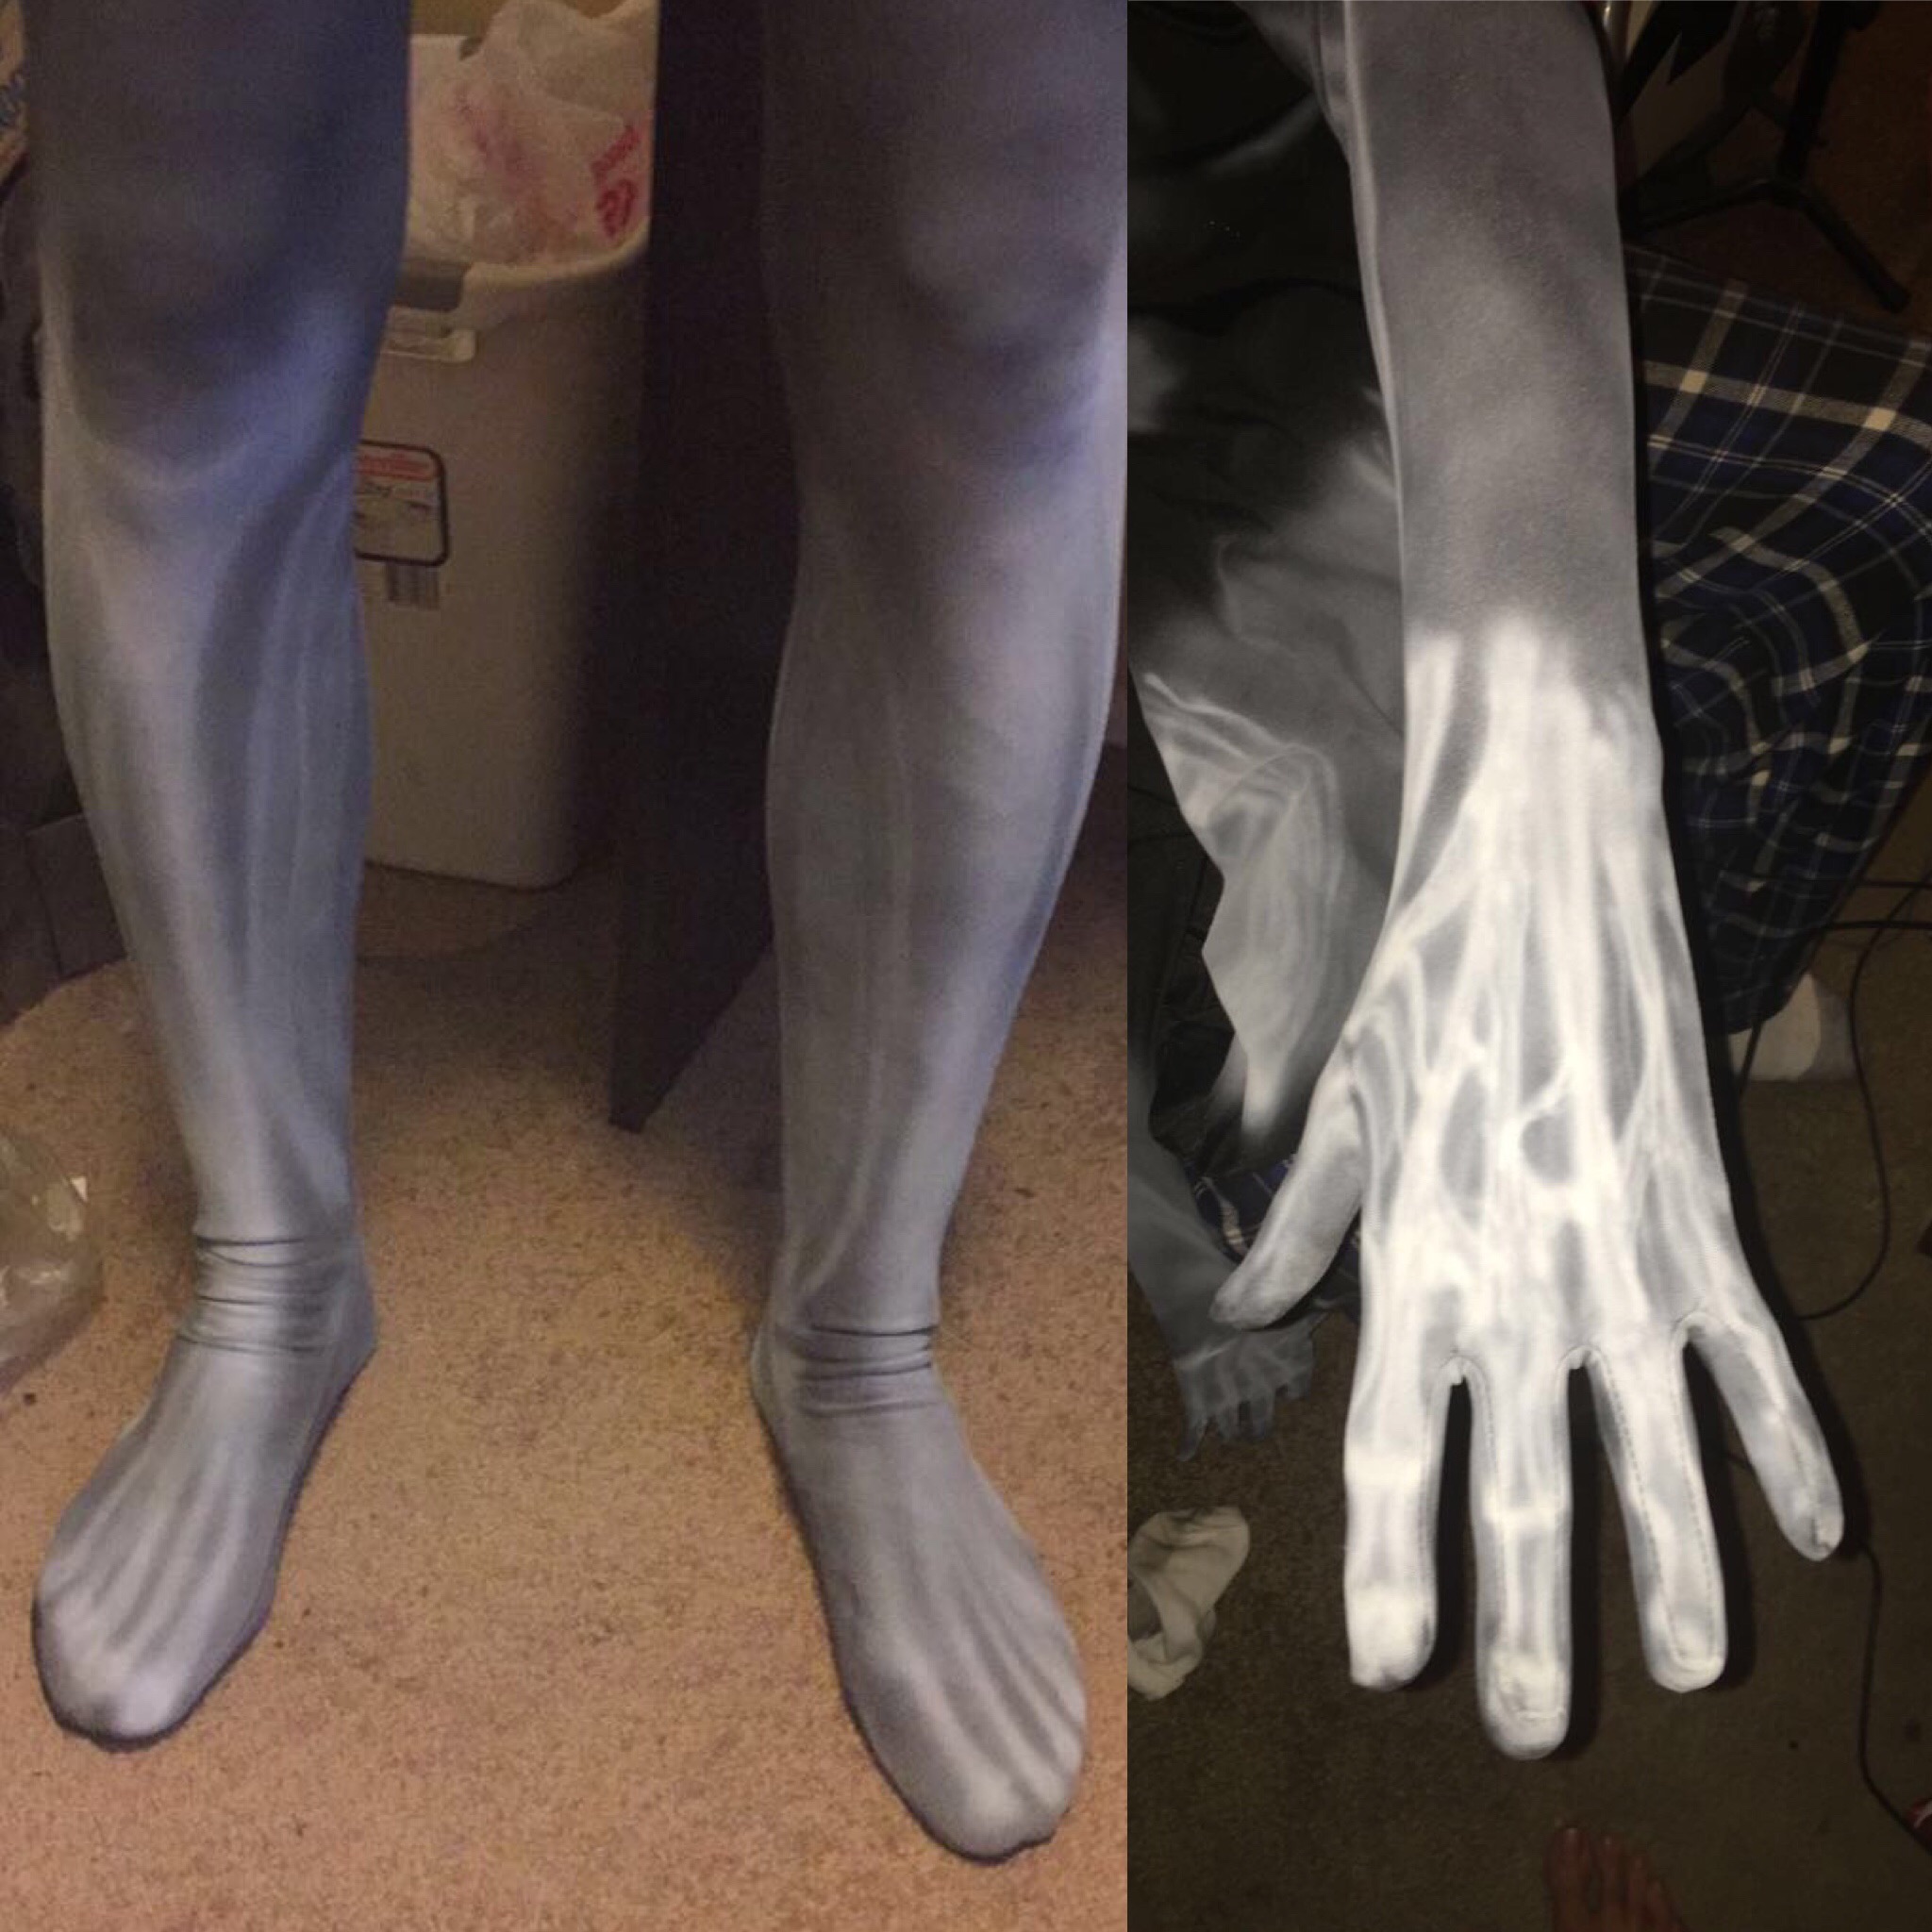 "Neither one of us wanted to deal with body paint at the con, so we opted to airbrush a body suit to achieve the mummified look of a Dragon Priest. I airbrushed the suit while Elling wore it (good thing he's patient because this took a while) and he heat-set the paint via ironing in between sessions."
 -
18.
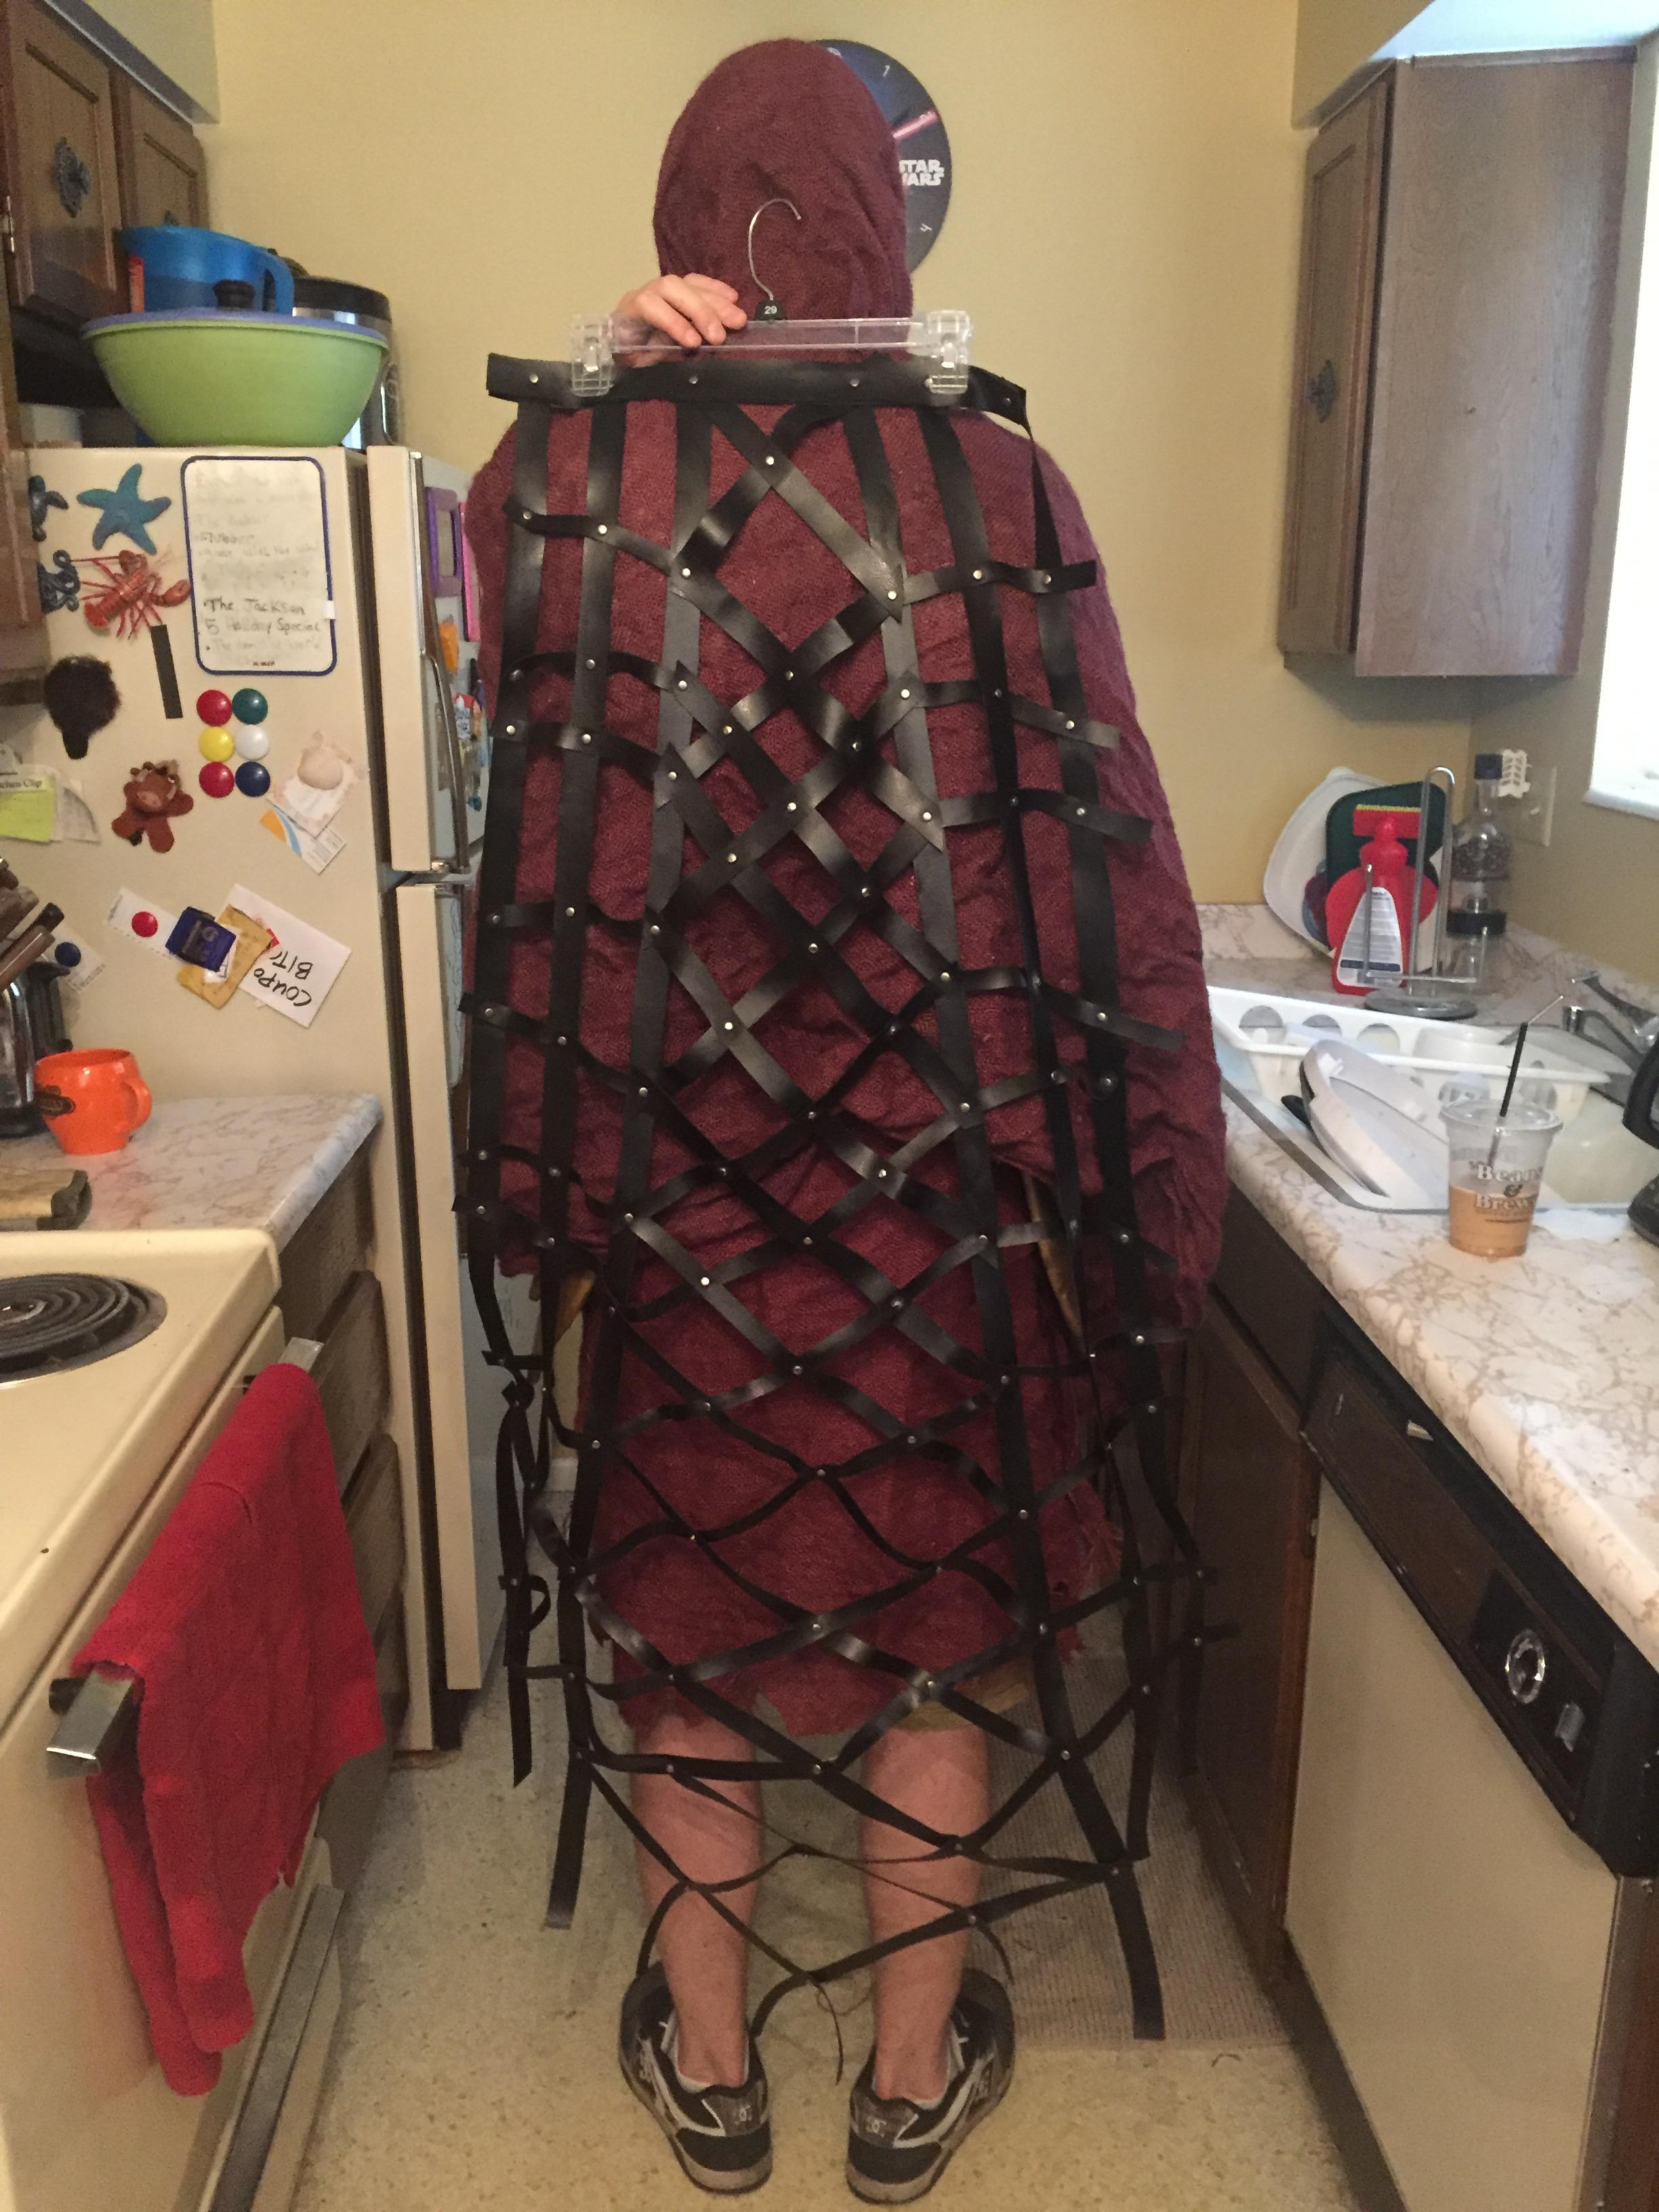 "Elling actually made this! He got so into it, too (I think he's hooked). This is just black vinyl strips, a bajillion rivets, and a simple wire framework to help maintain the lattice shape. I eventually glued this to the inside of the cuirass."
 -
19.
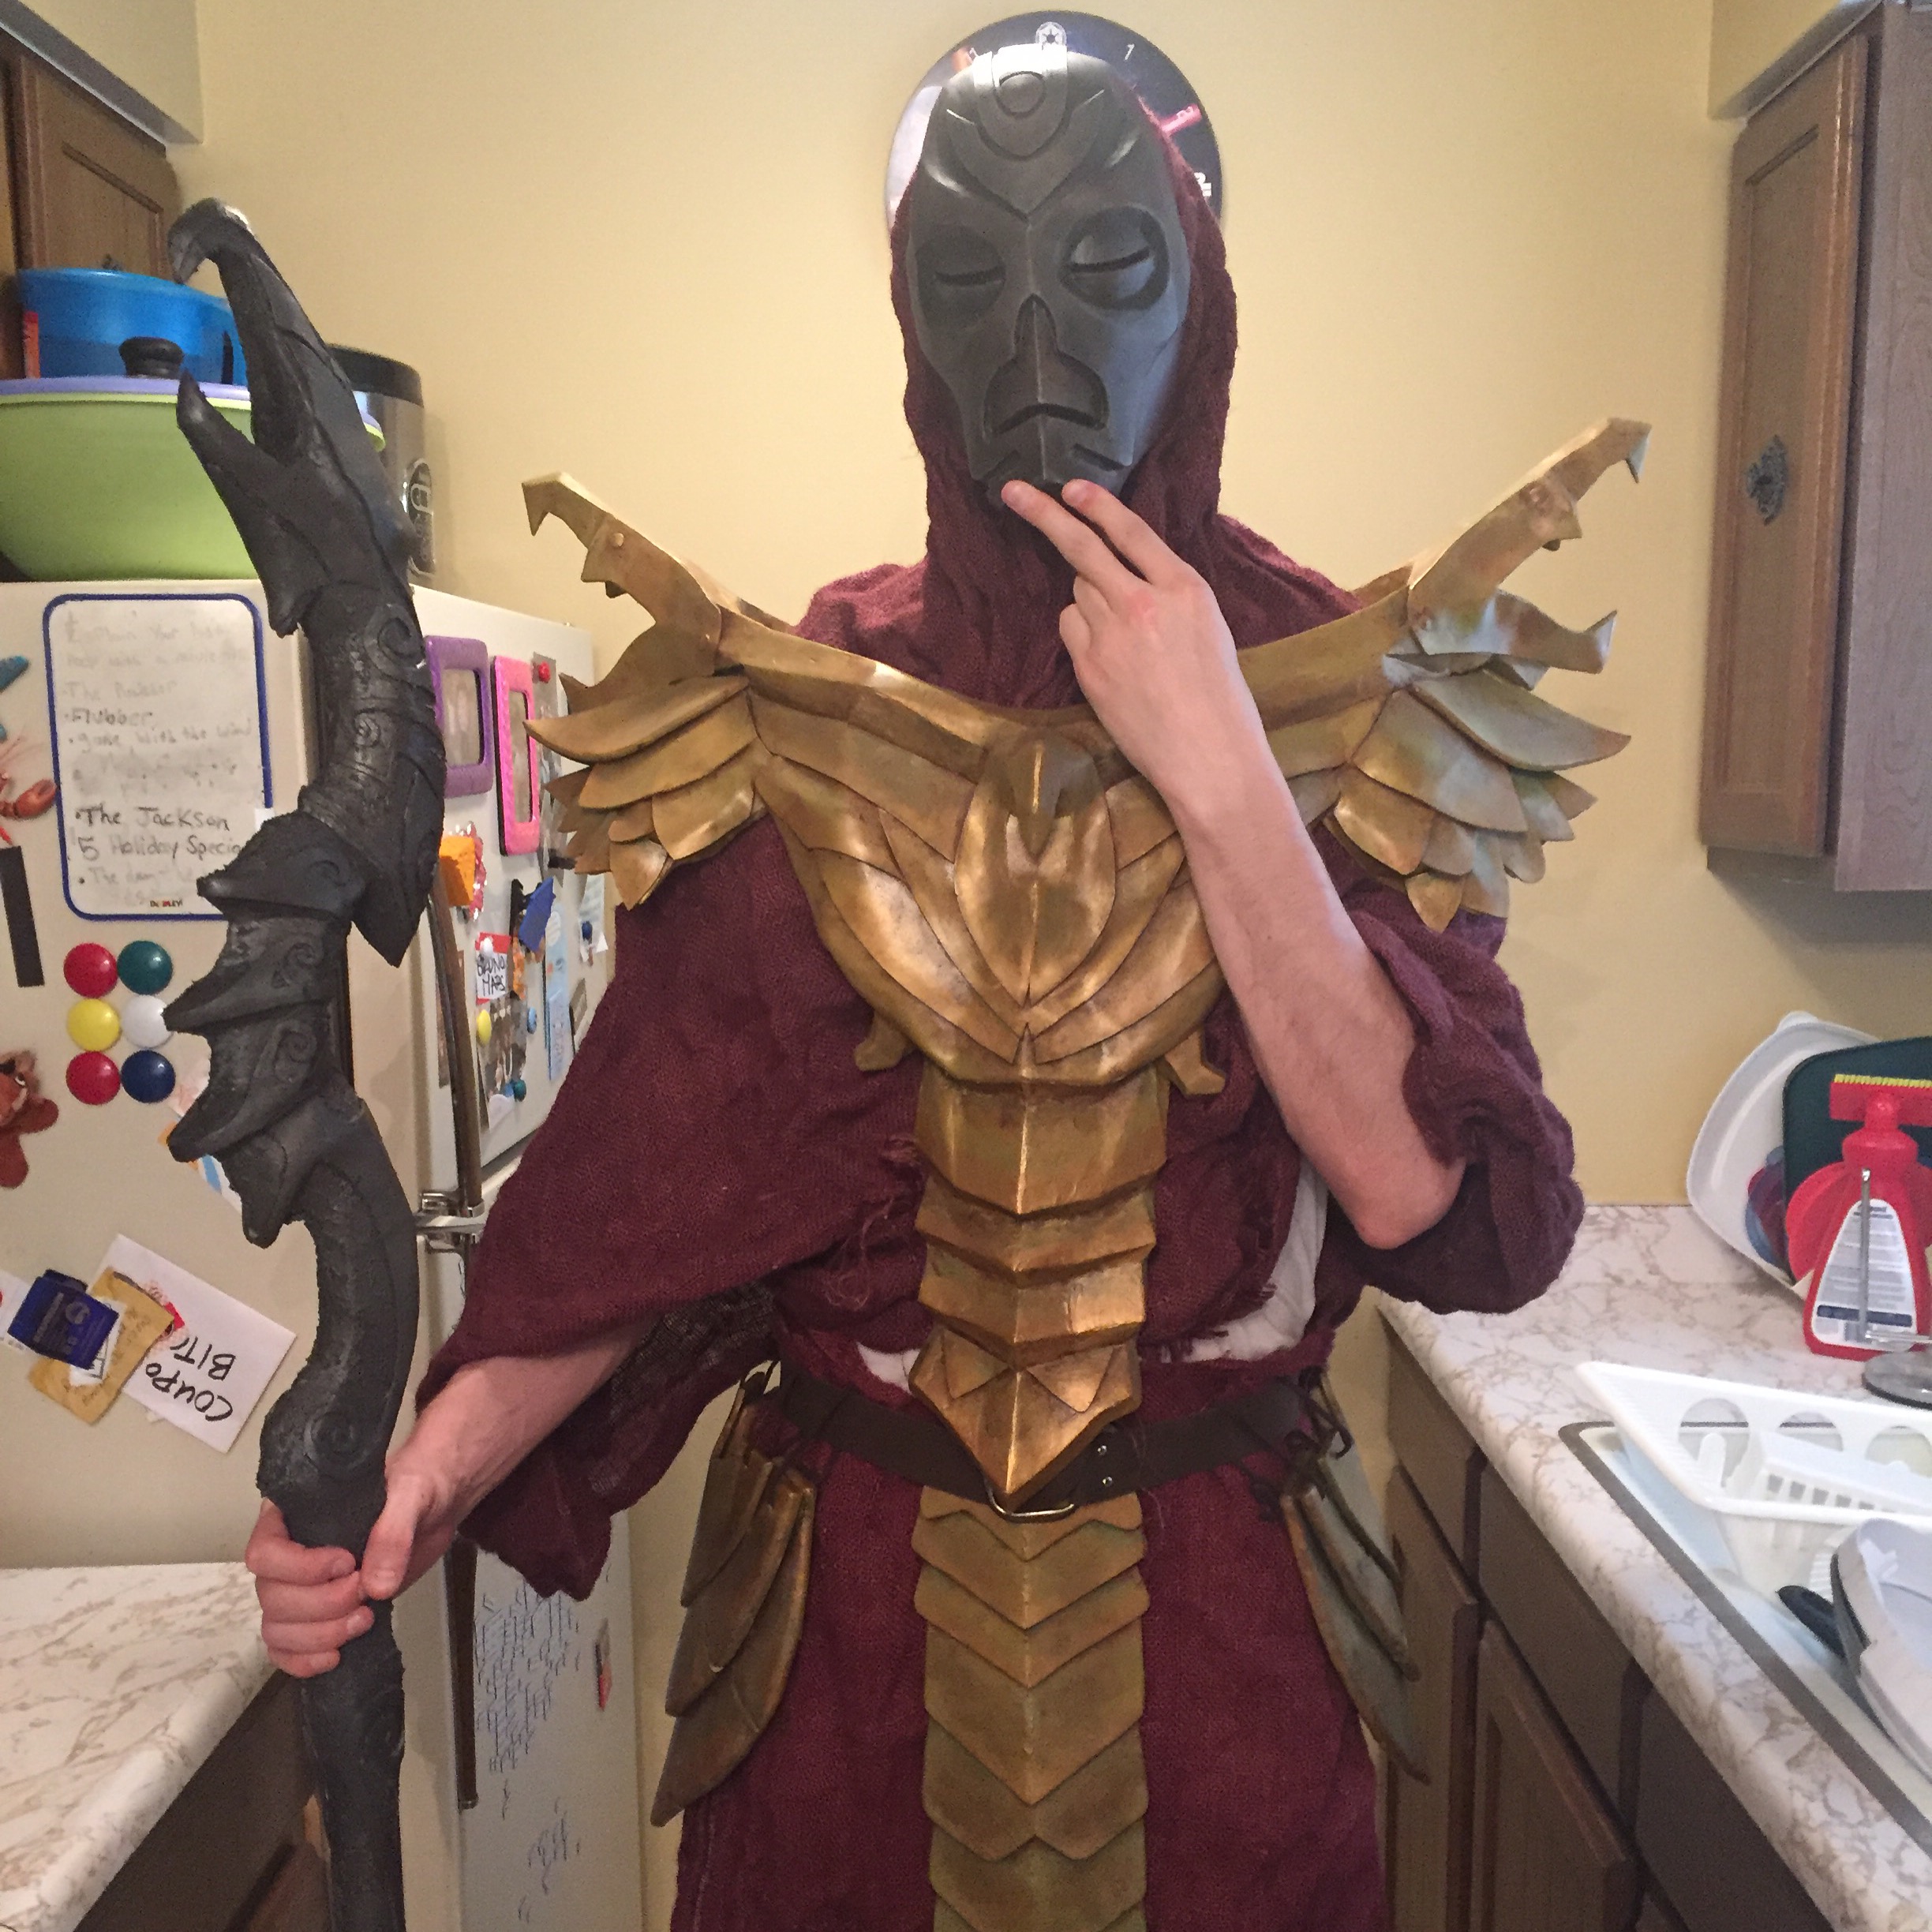 "At this point, all armor pieces had been fabricated and just needed to be assembled. The burlap still needed to be fitted, glued to the cuirass, and frayed at the edges. About 30 hours left!"
 -
20.
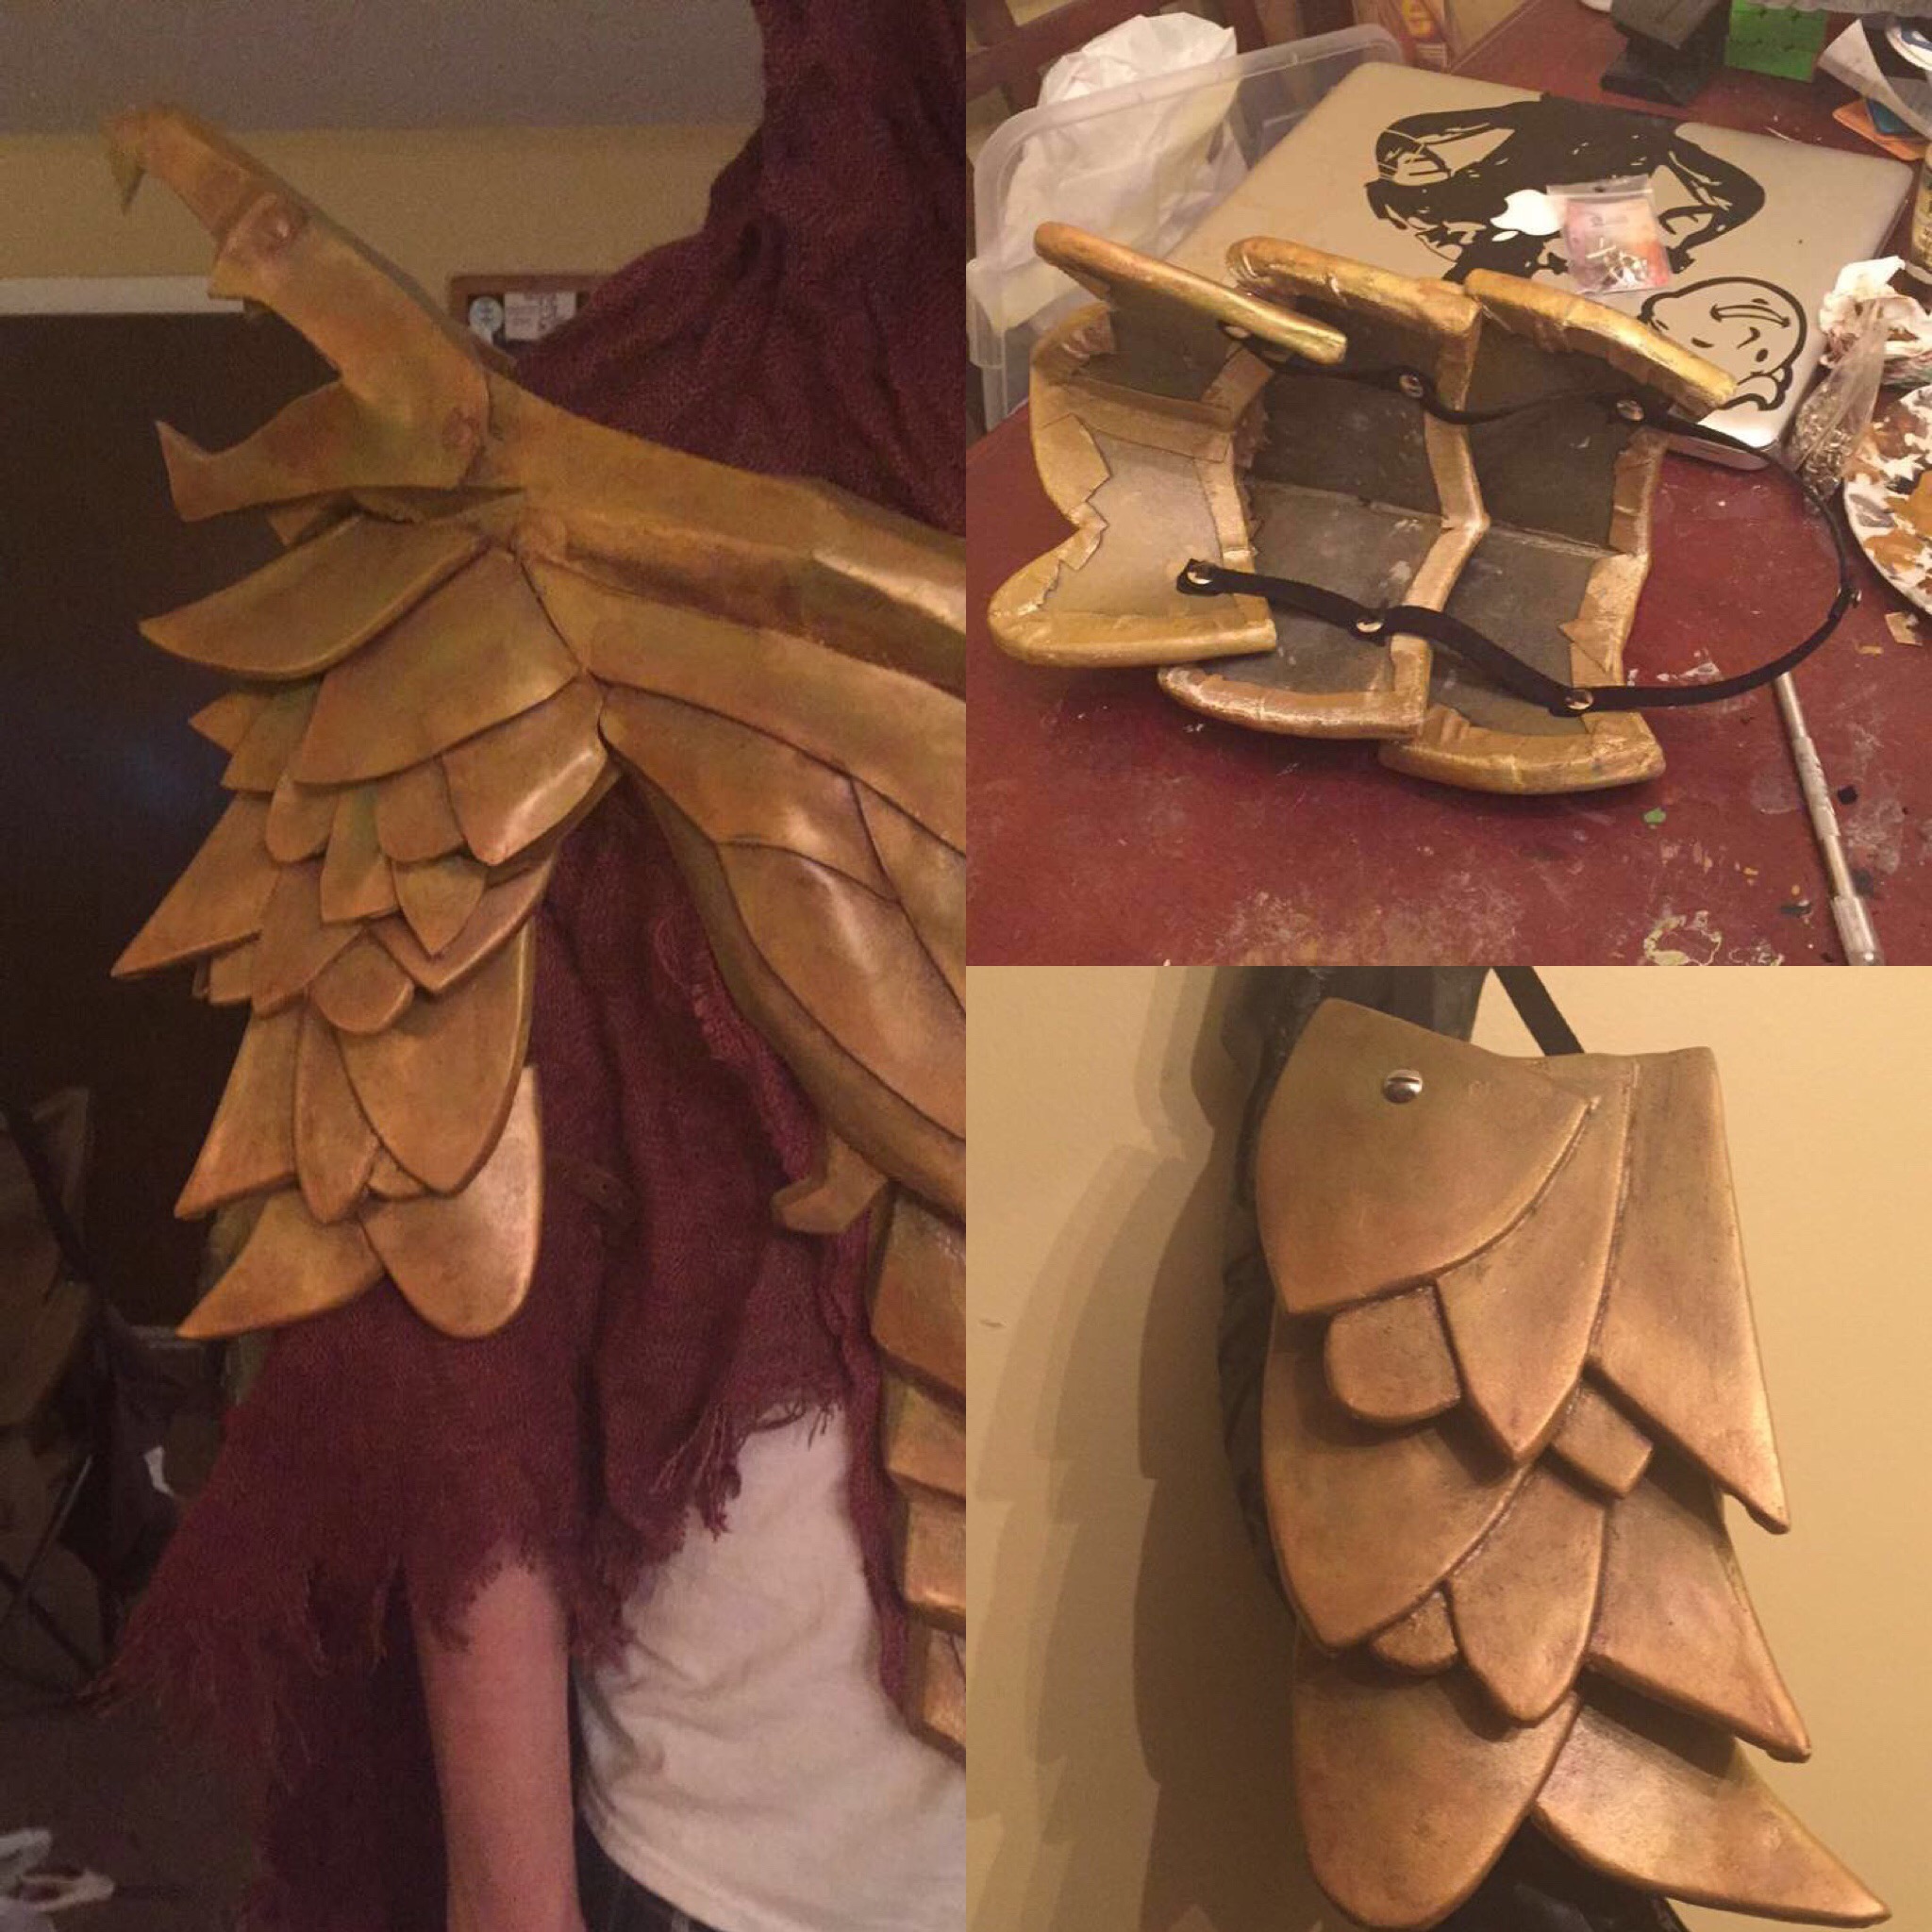 "This was BY FAR the most difficult part of the costume. It took about a dozen tries to correctly size the straps so that the upper arm pieces naturally hugged Elling's arm, while keeping the rivets hidden and allowing movement. When all was said and done, each arm is held in place with 12 straps."
 -
21.
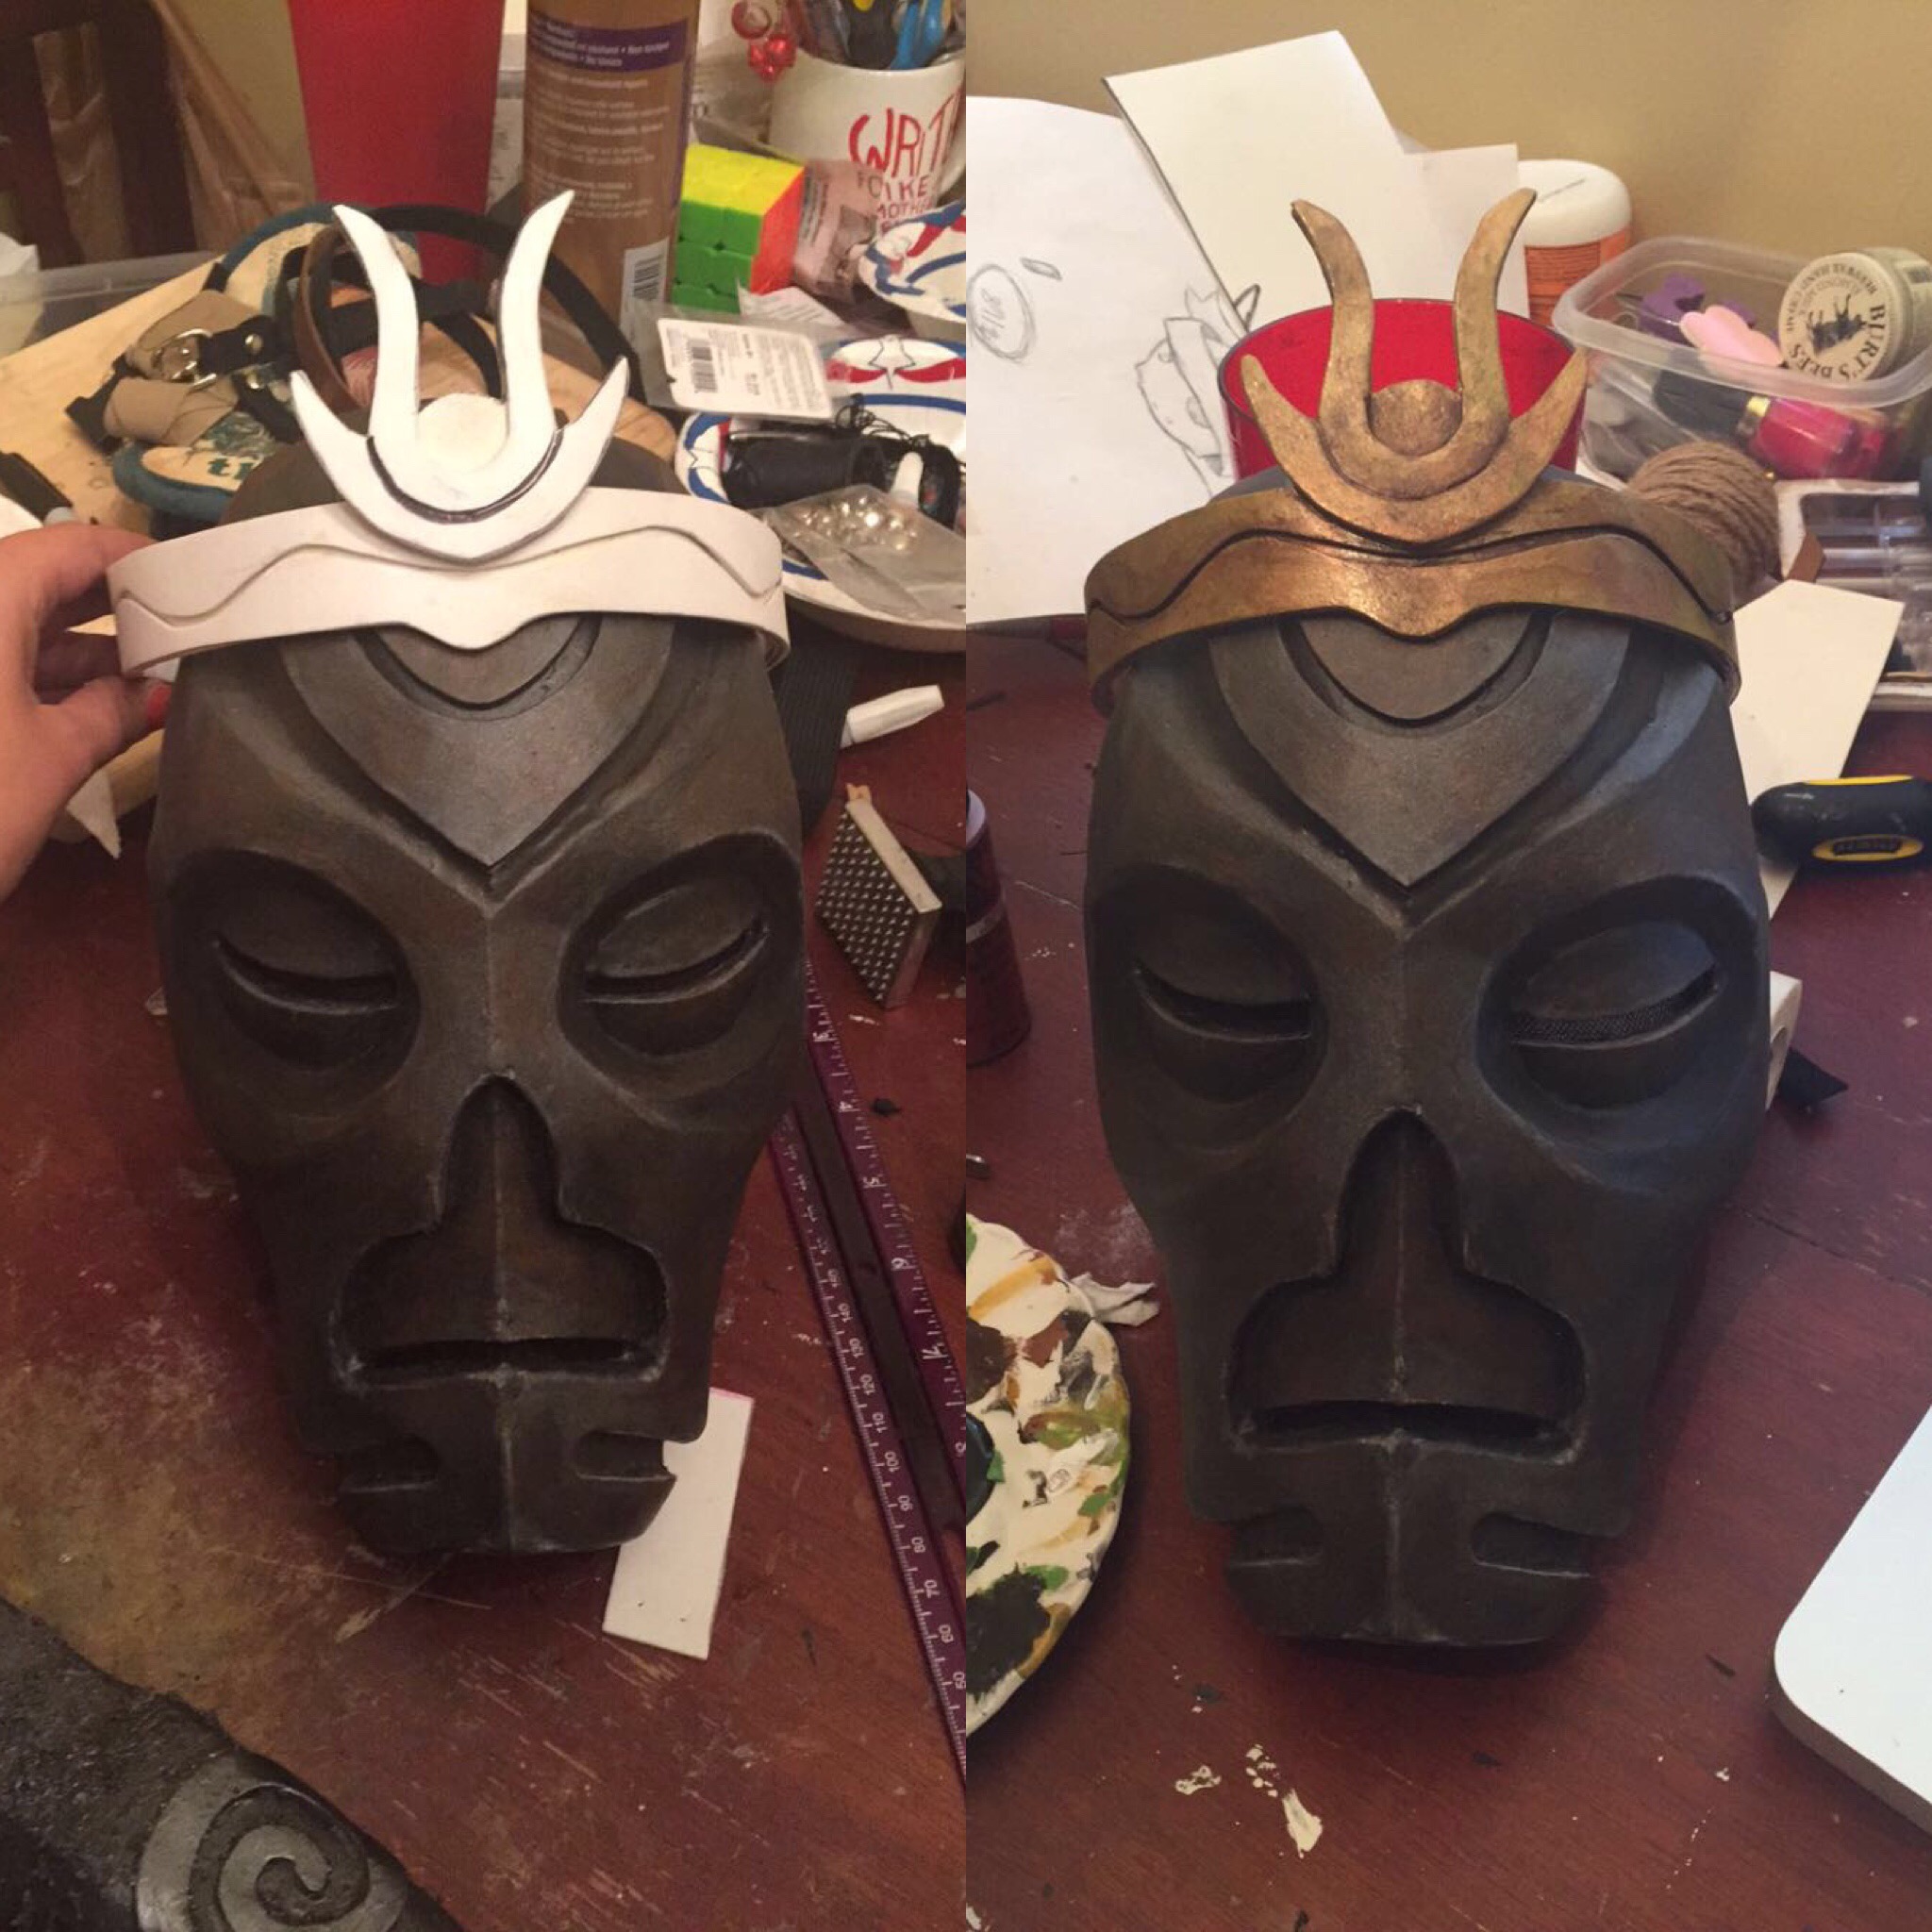 "Last but not least, the crown! I used 2mm EVA foam, contact cement, tacky glue, and paint. This attaches to the hood with Velcro."
 -
22.
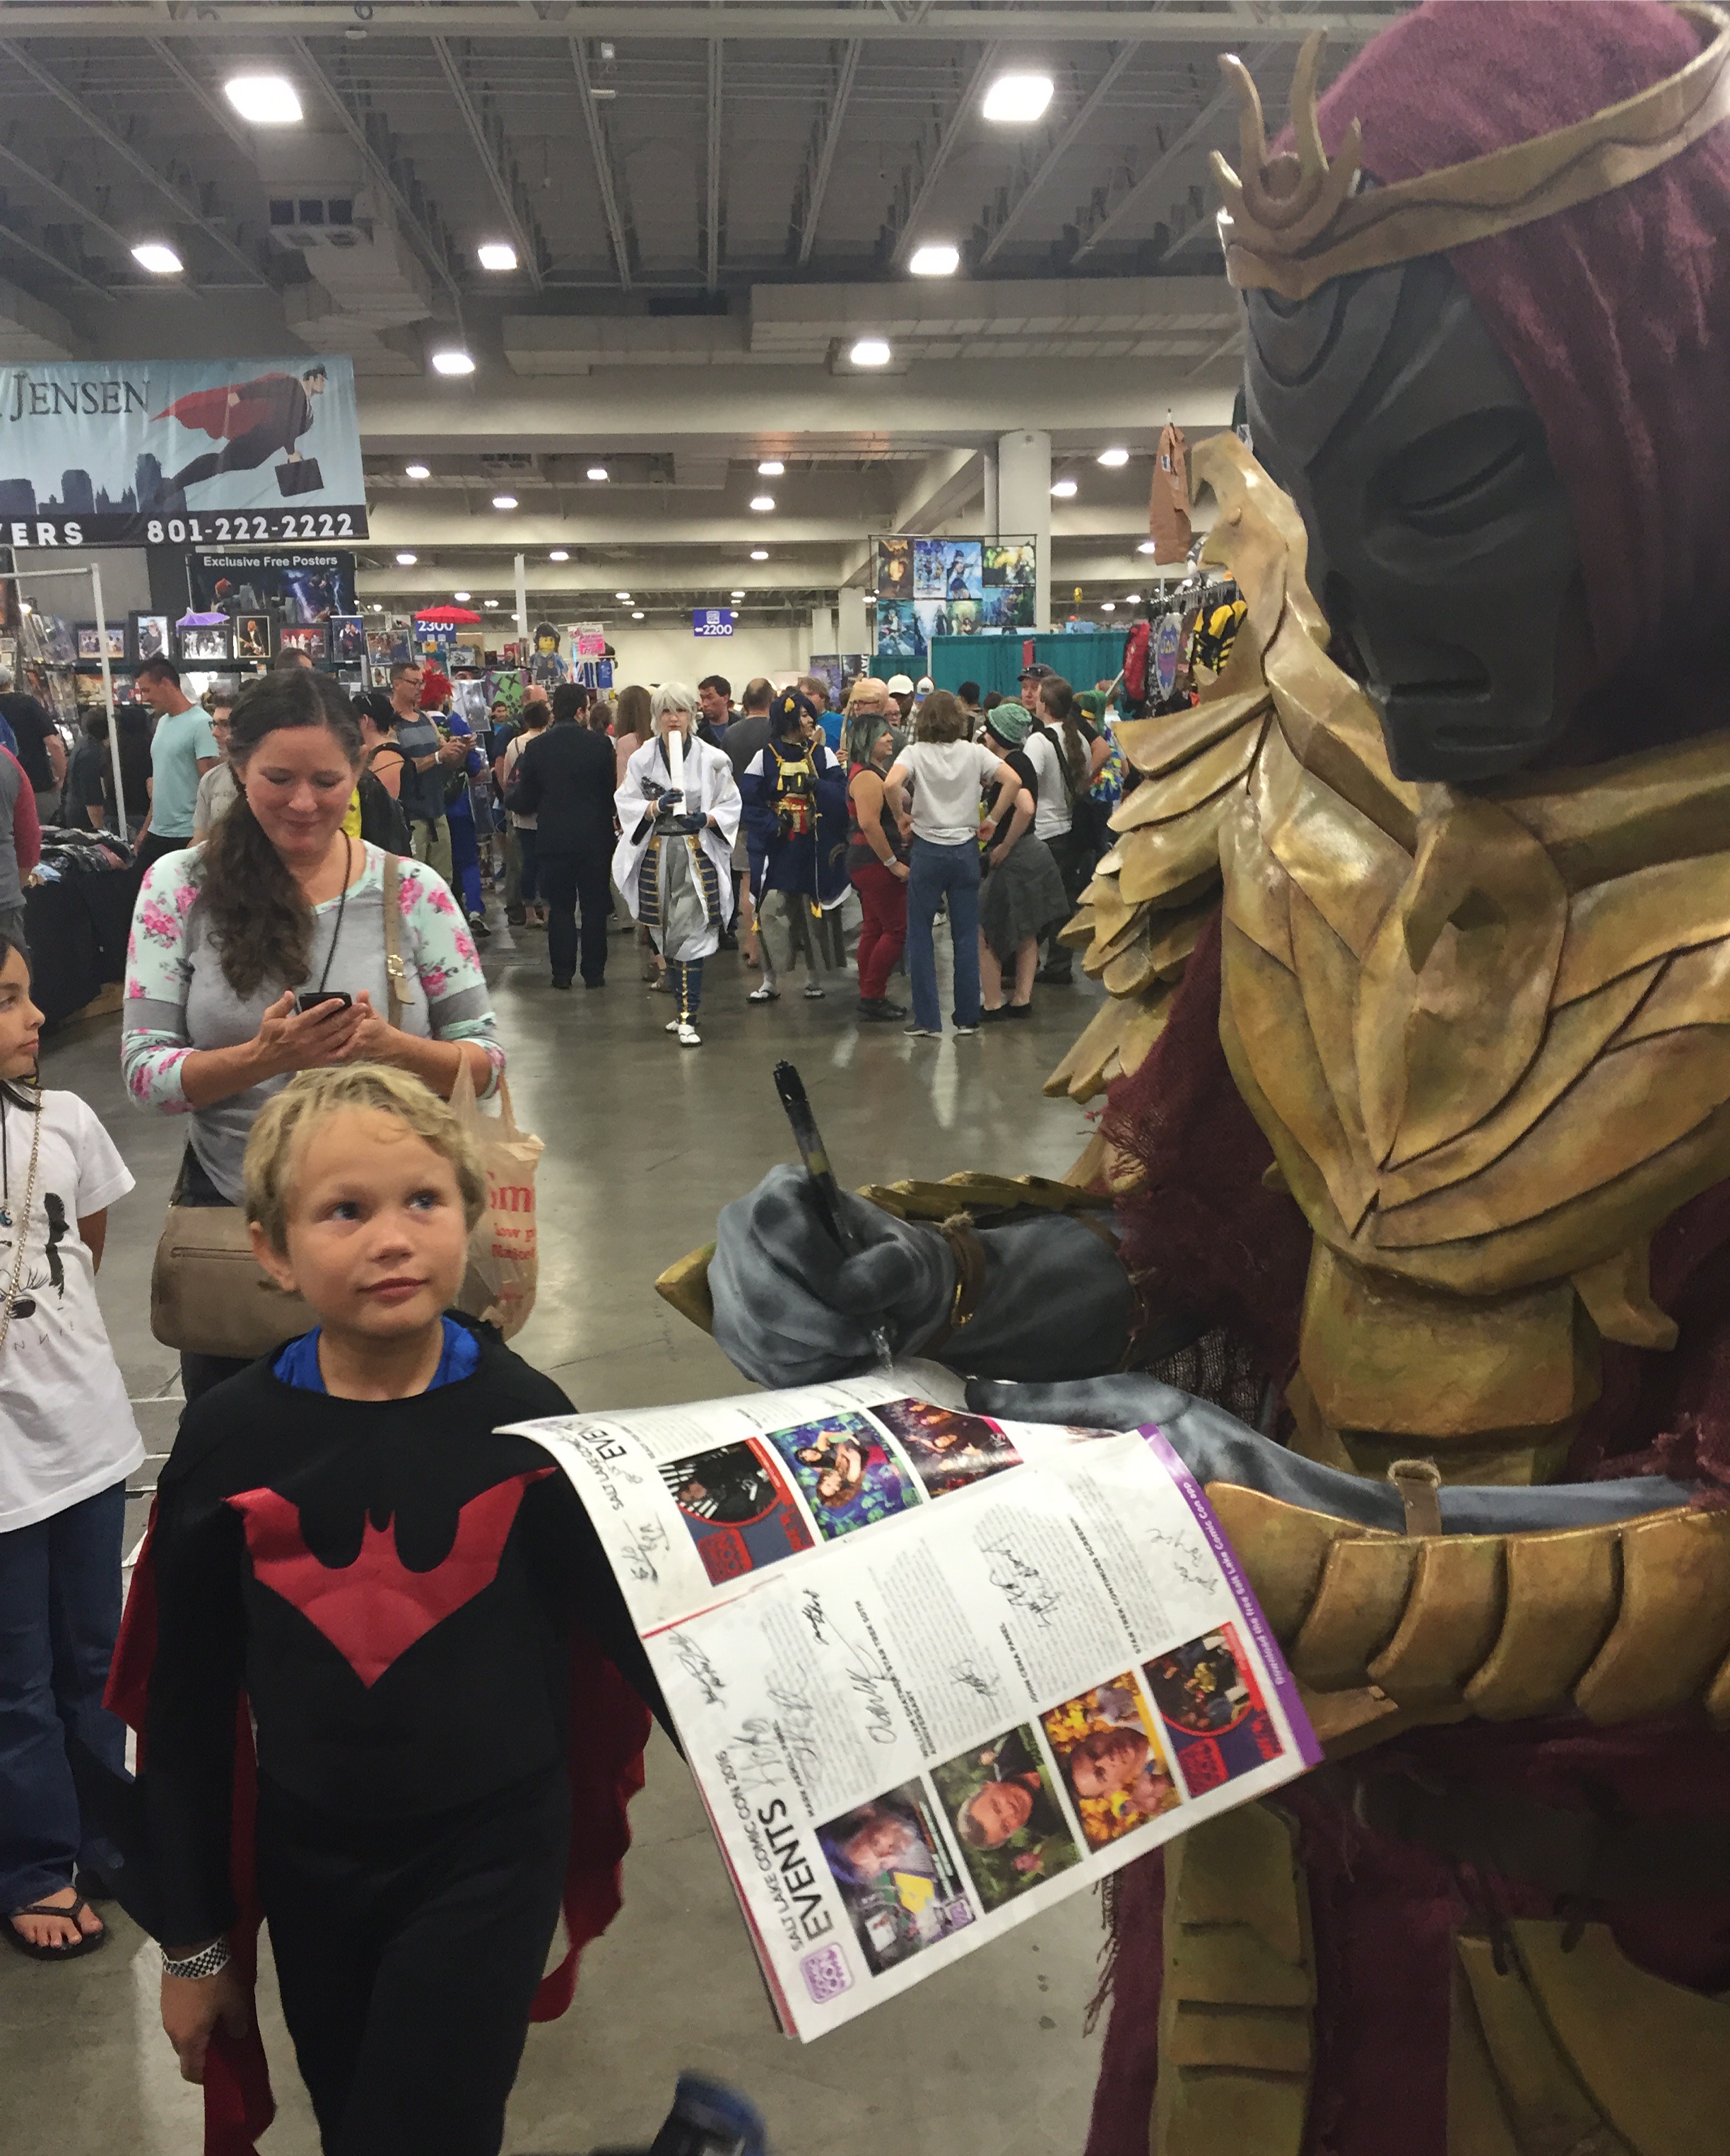 "And finally, here's Elling at the con with this lil guy who wanted his autograph. It ended up being one of our favorite moments from the con (I mean, look at his face!! It's heartwarming!) This kinda stuff is what makes cosplaying worth the time, money, and effort. I'm so happy I caught this on camera!"
 -
23.
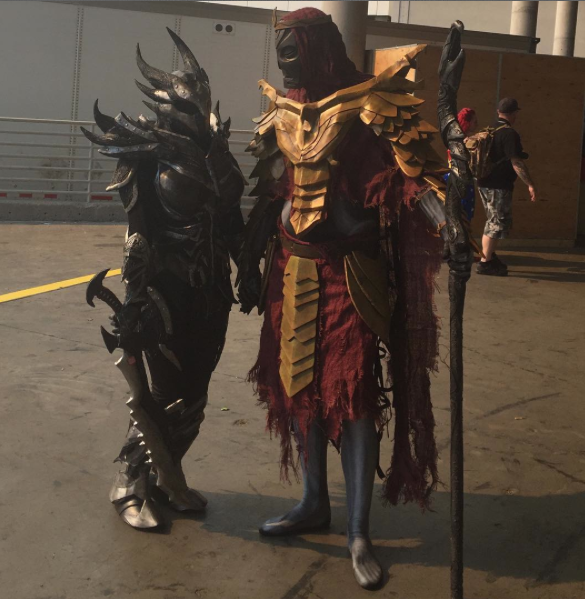 "Here we are at the con with arrows in our knees :) Overall, this set took about 250 hours over the course of 6 weeks to make and we had so much fun debuting our costumes together. And for those wondering, Elling is now hooked. We're thinking a Carved Nordic set next." Isn't love about sharing the things that are precious to you with people that are even more precious?
- REPLAY GALLERY
-
- Woman Made Her Boyfriend A Costume Co They Could Cosplay Together
- NEXT GALLERY
-

- Image Overload!
DaniStitches wrote "I love cosplaying so much and I really wanted to share a cosplay experience with my bf. He's relatively introverted and doesn't particularly like cons, but I was determined to find something that he'd want to wear with me. I kept throwing out suggestions, until finally, the Dragon Priest came up and he actually seemed pretty stoked on the idea, so we ran with it."
23/23
1/23
Categories:
Ftw






0 Comments